Unlock Decadence: Crafting the Ultimate Homemade Chocolate Cake
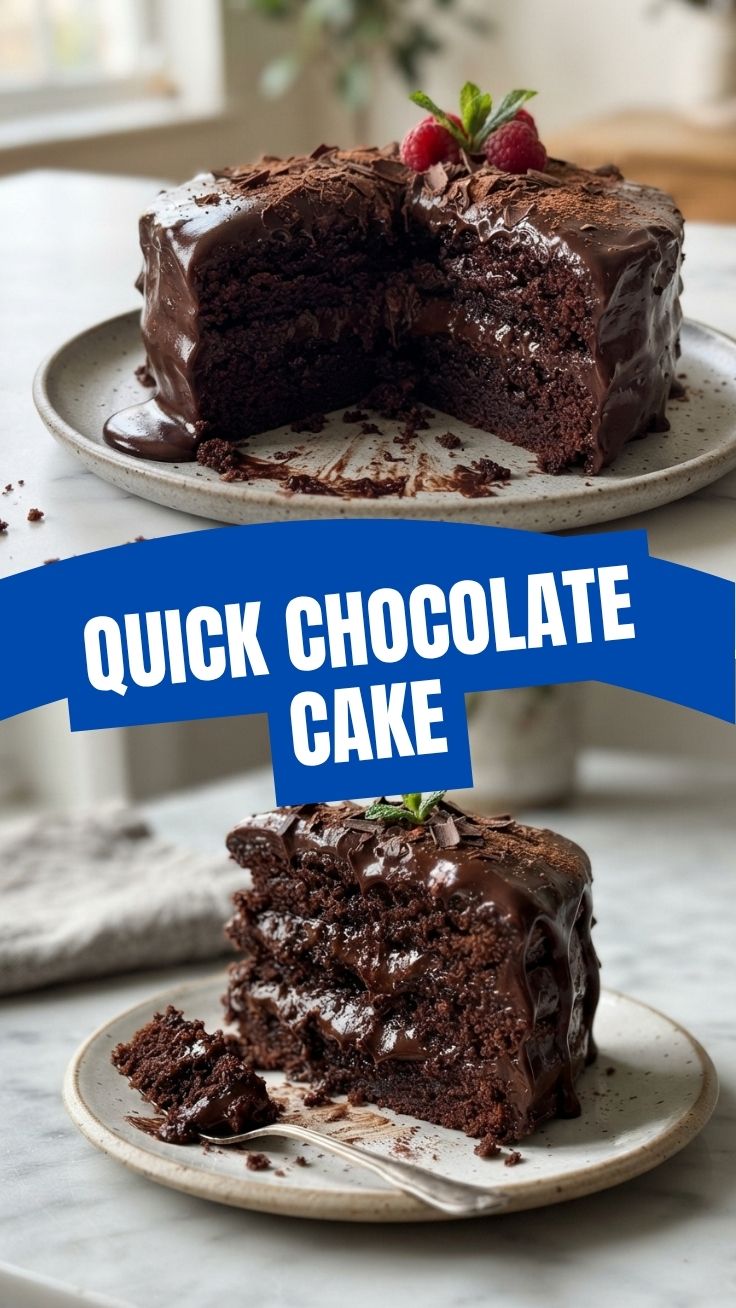
Ever wondered if you could truly recreate that melt-in-your-mouth, intensely satisfying Chocolate Cake experience right in your own kitchen? The answer is a resounding YES! While store-bought options can be convenient, nothing quite compares to the rich aroma, personalized sweetness, and sheer joy of baking a perfect homemade cake. And when it comes to elevating that experience, mastering the art of a silky smooth Frosting is an absolute game-changer. This post will guide you through crafting a truly unforgettable dessert, brimming with deep cocoa notes and a luscious texture, proving that gourmet indulgence is well within your reach.
Ingredients & Kitchen Tools
Crafting the perfect confection requires both quality ingredients and the right culinary arsenal. Below is a comprehensive list, along with brief explanations and potential substitutions.
All-Purpose Flour (2 cups): The backbone of our cake, providing structure. Substitution: Gluten-free all-purpose blend for dietary needs.*
- Granulated Sugar (1 ¾ cups): Sweetness and moisture.
Unsweetened Cocoa Powder (¾ cup): Essential for that deep chocolate flavor. Look for Dutch-processed for a darker, less acidic cake.*
- Baking Soda (1 ½ teaspoons): A leavening agent that helps the cake rise.
- Baking Powder (1 ½ teaspoons): Another leavening agent, creating a light texture.
- Salt (1 teaspoon): Balances sweetness and enhances flavor.
Large Eggs (2): Binders, adding richness and structure. Substitution: Flax eggs (1 tbsp ground flaxseed + 3 tbsp water per egg) for vegan.*
Milk (1 cup): Adds moisture and tenderizes the crumb. Substitution: Buttermilk for a tangier, more moist cake, or non-dairy milk.*
Vegetable Oil (½ cup): Contributes to a moist texture. Substitution: Canola oil or melted unsalted butter.*
Vanilla Extract (2 teaspoons): Enhances all other flavors. Use pure vanilla for best results.*
Boiling Water (1 cup): Activates the cocoa and creates a fudgy texture. Don’t skip this!*
- Unsalted Butter (1 cup, softened): For the exquisite Frosting.
- Powdered Sugar (4-5 cups): For the Frosting, ensuring a smooth consistency.
- Heavy Cream (¼ – ½ cup): For the Frosting, adds richness and adjust consistency.
- Non-Stick Cooking Spray or Butter & Flour: For preparing cake pans.
Kitchen Tools:
- Two 9-inch Round Cake Pans: Essential for baking even layers.
- Large Mixing Bowls (2): For dry and wet ingredients.
- Electric Mixer (Stand or Handheld): For creaming butter and sugar, and whipping Frosting.
- Whisk: For combining dry ingredients.
- Spatula: For scraping bowls and folding.
- Measuring Cups & Spoons: Accuracy is key in baking.
- Wire Rack: For cooling cakes completely.
- Offset Spatula or Butter Knife: For spreading Frosting.
- Parchment Paper: For lining cake pans (optional, but highly recommended for easy release).
Prep Time & Cooking Schedule
Planning is half the battle when baking. This recipe requires a manageable amount of time, allowing you to enjoy the process without feeling rushed.
- Prep Time: 20-25 minutes
* This includes gathering ingredients, preheating the oven, and preparing the cake pans.
- Cook Time: 30-35 minutes
* Baking time for the cake layers.
- Cooling Time: 1-2 hours
* Crucial for ensuring the cake layers are firm enough to handle and frost. Do not rush this step, as warm cakes will cause the Frosting to melt.
- Frosting & Assembly Time: 20-30 minutes
* Once the cakes are cool, you’re ready for the grand finale!
Step-by-Step Instructions
Embark on your baking adventure with these detailed steps, ensuring a successful and delicious outcome.
1. Preheat & Prepare: Preheat your oven to 350°F (175°C). Grease and flour two 9-inch round cake pans, or line the bottoms with parchment paper and grease the sides. This prevents sticking and ensures easy removal.
2. Combine Dry Ingredients: In a large bowl, whisk together the all-purpose flour, granulated sugar, unsweetened cocoa powder, baking soda, baking powder, and salt. Make sure there are no lumps for an even texture.
3. Mix Wet Ingredients: In a separate medium bowl, beat the eggs, milk, vegetable oil, and vanilla extract until well combined.
4. Combine Wet & Dry: Gradually add the wet ingredients to the dry ingredients, mixing on low speed with an electric mixer (or by hand) until just combined. Do not overmix; a few lumps are okay.
5. Add Boiling Water: Carefully stir in the boiling water. The batter will be thin – this is normal and contributes to the cake’s moistness.
6. Bake the Cake: Divide the batter evenly between the prepared cake pans. Bake for 30-35 minutes, or until a wooden skewer inserted into the center comes out clean.
7. Cooling Down: Let the cake layers cool in their pans for 10-15 minutes before inverting them onto a wire rack to cool completely. This full cooling process is vital for successful frosting.
8. Prepare the Frosting: While the cakes cool, prepare your delightful Frosting. In a large bowl with an electric mixer, beat the softened unsalted butter until light and fluffy. Gradually add the powdered sugar, one cup at a time, alternating with splashes of heavy cream, until smooth and spreadable. Beat in vanilla extract. Adjust consistency with more powdered sugar for thicker Frosting or more cream for a thinner consistency.
9. Assemble and Decorate: Once the layers of Chocolate Cake are completely cool, place one layer on your serving plate. Spread a generous amount of Frosting evenly over the top. Carefully place the second layer on top and then frost the top and sides of the entire cake.
Nutritional Benefits & Advantages
Beyond its undeniable deliciousness, this homemade Chocolate Cake offers some advantages. Dark cocoa powder, a primary ingredient, is rich in antioxidants, which can contribute to heart health and reduce inflammation. While sugar content is present, baking at home allows for control over ingredient quality and portion sizes. Enjoying a small slice of a homemade dessert, made with real ingredients and love, can be a valuable part of a balanced diet, offering not just physical sustenance but also emotional well-being and satisfaction.
Tips, Variations & Cooking Advice
- Flavor Boost: Add a pinch of espresso powder to the batter along with the dry ingredients to deepen the chocolate flavor without making it taste like coffee.
- Moisture Magic: For an even moister cake, brush the cooled layers with a simple syrup (equal parts sugar and water, boiled and cooled) before frosting.
- Alternative Frosting: Experiment with cream cheese Frosting for a tangy contrast, or a luscious ganache for intense chocolate flavor.
- Dietary Adaptations:
* Gluten-Free: Substitute the all-purpose flour with an equal amount of a good quality gluten-free baking blend that includes xanthan gum.
* Dairy-Free: Use non-dairy milk (almond, soy, oat) and dairy-free butter for the cake and Frosting.
- Layer Customization: For a three-layer cake, simply divide the batter among three 8-inch pans and adjust baking time accordingly (likely slightly less).
Common Mistakes to Avoid
- Overmixing: Overmixing the batter develops the gluten, resulting in a tough, dry cake. Mix until just combined.
- Warm Cakes & Frosting: Attempting to frost warm cakes will lead to a melted, messy Frosting. Patience is key!
- Incorrect Pan Preparation: Skimping on greasing and flouring or parchment paper can lead to cakes sticking to the pan and breaking upon removal.
- Inaccurate Measuring: Baking is a science. Use proper measuring techniques (e.g., spooning flour into a measuring cup and leveling off).
- Opening Oven Door Too Soon: Resist the urge to peek at your cake before it’s adequately set, especially in the first 20 minutes, as this can cause it to collapse.
Storage & Meal Prep Tips
Proper storage ensures your delicious creation stays fresh and enjoyable.
- Room Temperature: An unfrosted cake can be stored, tightly wrapped, at room temperature for up to 2 days. A frosted Chocolate Cake, especially with a buttercream Frosting, is best stored at cool room temperature for up to 3 days in an airtight container. If you used a cream cheese Frosting, refrigeration is necessary.
- Refrigeration: For longer storage, refrigerate the cake in an airtight container for up to 5-7 days. Bring slices to room temperature before serving for the best flavor and texture.
- Freezing: Both unfrosted and frosted cake layers can be frozen. Wrap unfrosted layers tightly in plastic wrap and then foil. For frosted cake, freeze until the Frosting is firm, then wrap in plastic and foil. It will keep for up to 2-3 months. Thaw in the refrigerator overnight.
- Meal Prep: Bake the cake layers ahead of time and freeze them. Thaw when ready to assemble and frost for a fresh-tasting dessert with minimal last-minute effort.
Conclusion
There’s something incredibly rewarding about baking a truly spectacular Chocolate Cake from scratch. This recipe provides a robust foundation for a delightfully rich and moist confection, crowned with an indulgent Frosting that will impress anyone lucky enough to take a bite. By following these steps and tips, you’re not just baking a cake; you’re creating a memorable experience and a testament to the joys of homemade goodness. We encourage you to try this recipe and share your delectable results with us! What’s your favorite way to enjoy a slice of homemade chocolate heaven?
FAQs
Q1: Can I make this cake ahead of time?
A1: Absolutely! The cake layers can be baked a day or two in advance, wrapped tightly, and stored at room temperature or frozen. The Frosting can also be made a day ahead and refrigerated, then re-whipped before use.
Q2: What can I use if I don’t have buttermilk?
A2: You can easily make a buttermilk substitute: add 1 tablespoon of white vinegar or lemon juice to a liquid measuring cup, then fill the rest with regular milk to the 1-cup line. Let it sit for 5-10 minutes until it slightly curdles.
Q3: My cake is dry, what went wrong?
A3: Common culprits for dry cake include overmixing the batter, overbaking, or using too much flour. Ensure you measure accurately and bake only until a skewer comes out clean.
Q4: How can I make my Frosting smoother?
A4: Sifting your powdered sugar before adding it to the butter can prevent lumps. Also, ensure your butter is truly softened, not melted, for the best consistency. A touch more heavy cream can help achieve a silkier texture.
Q5: Can I reduce the sugar in the recipe?
A5: While possible, reducing sugar significantly can affect the cake’s texture and moisture. For a slight reduction, you can try decreasing the sugar in the cake by ¼ cup and adjusting the powdered sugar in the Frosting to taste.