Slice into Autumn: The Ultimate Homemade Pumpkin Pie Experience
Are you ready to truly embrace the crisp, comforting flavors of autumn? There’s nothing quite like the aroma of a freshly baked Pumpkin Pie wafting through your home, promising warmth and deliciousness with every single bite. While store-bought versions can be convenient, crafting this iconic dessert from scratch elevates it to an entirely new level. Beyond the supreme taste, preparing your own Pumpkin Pie allows you to control the quality of ingredients, personalize the sweetness, and infuse it with the perfect balance of aromatic pumpkin pie spice. This comprehensive guide will walk you through every step, ensuring your homemade pie is not just good, but unforgettable. Get ready to impress your taste buds and loved ones with a dessert that truly embodies the spirit of the season, enhanced by the quintessential pumpkin pie spice blend.
Ingredients & Kitchen Tools
- For the Crust:
* 1 ½ cups all-purpose flour: The base for a flaky and sturdy crust.
* ½ teaspoon salt: Enhances flavor.
* ½ cup (1 stick) unsalted butter, very cold and cubed: Essential for flakiness; substitutes include chilled shortening or a blend of both.
* ¼ cup ice water: Slowly add as needed to bring the dough together without overworking.
- For the Filling:
* 1 (15-ounce) can pumpkin puree: Pure, unsweetened pumpkin (not pumpkin pie filling).
* 1 (14-ounce) can sweetened condensed milk: Provides sweetness and a creamy texture; no need for additional sugar.
* 2 large eggs: Binds the filling together.
* 2 teaspoons pumpkin pie spice: The star blend of cinnamon, ginger, nutmeg, and cloves, or create your own blend.
* ½ teaspoon salt: Balances the sweetness and enhances the overall flavor.
* Optional garnish: Whipped cream or a dusting of cinnamon.
- Kitchen Tools:
* 9-inch pie plate: Standard size for most pies.
* Large mixing bowls: For both crust and filling.
* Pastry blender or food processor: For cutting butter into flour.
* Rolling pin: For rolling out the pie crust.
* Whisk: For combining filling ingredients.
* Measuring cups and spoons: For precise ingredient measurements.
* Wire rack: For cooling the baked pie.
Prep Time & Cooking Schedule
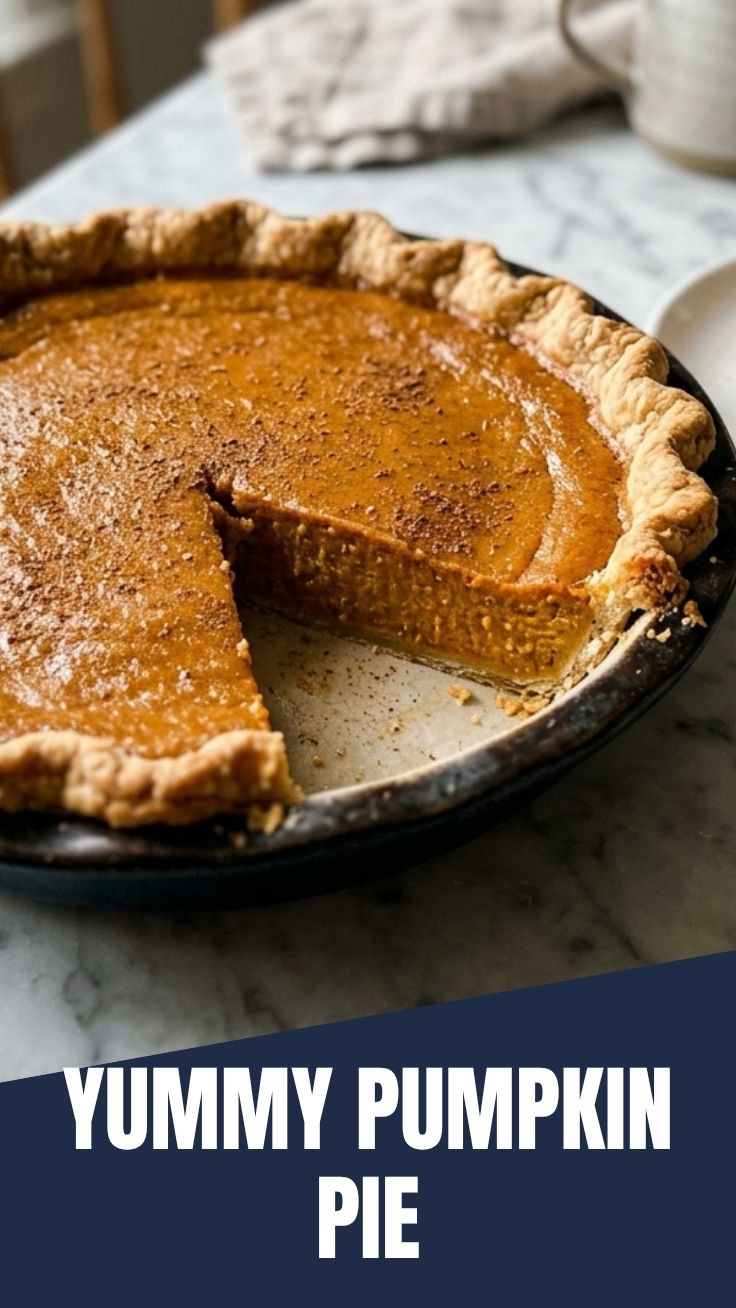
- Prep Time: 20-30 minutes (includes making the crust and preparing the filling).
- Chill Time (Crust): 30 minutes (crucial for a flaky crust).
- Cook Time: 50-60 minutes.
- Resting Time: 2-3 hours (essential for the pie to set properly before slicing). Plan to bake your pie well in advance of serving to allow adequate cooling and setting time.
Step-by-Step Instructions
1. Prepare the Pie Crust: In a large bowl, whisk together flour and salt. Cut in the very cold, cubed butter using a pastry blender or your fingertips until the mixture resembles coarse crumbs with pea-sized pieces of butter. Gradually add ice water, one tablespoon at a time, mixing until just combined and the dough comes together. Do not overmix. Form into a disc, wrap in plastic, and refrigerate for at least 30 minutes.
2. Roll out the Crust: On a lightly floured surface, roll the chilled dough into a 12-inch circle. Carefully transfer the dough to your 9-inch pie plate. Trim and crimp the edges as desired.
3. Preheat Oven & Prepare Filling: Preheat your oven to 425°F (220°C). In a large mixing bowl, combine the pumpkin puree, sweetened condensed milk, eggs, two teaspoons of fragrant pumpkin pie spice, and ½ teaspoon salt. Whisk until smooth and well combined. This blend of classic spices is what truly defines a perfect Pumpkin Pie.
4. Bake the Pie: Pour the pumpkin filling into the prepared pie crust. Bake for 15 minutes at 425°F (220°C). Reduce oven temperature to 350°F (175°C) and continue baking for another 35-45 minutes, or until a knife inserted near the center comes out clean. If the crust begins to brown too quickly, you can cover the edges with aluminum foil.
5. Cool and Serve: Remove from oven and cool completely on a wire rack for at least 2-3 hours before slicing and serving. This resting period is critical for the pie to set properly, ensuring clean slices.
Nutritional Benefits & Advantages
Pumpkin is not just a seasonal delight; it’s a nutritional powerhouse. It’s rich in Vitamin A (from beta-carotene), which is vital for vision and immune function, and a good source of Vitamin C, potassium, and fiber. Choosing homemade allows you to avoid artificial flavors and preservatives often found in store-bought options. Using sweetened condensed milk simplifies the recipe while providing a smooth, creamy texture and consistent sweetness without needing additional refined sugars, and the natural blend of pumpkin pie spice offers anti-inflammatory and antioxidant benefits.
Tips, Variations & Cooking Advice
- Spice it Up: Feel free to adjust the amount of pumpkin pie spice to your liking, or add a pinch of black pepper or cardamom for an unexpected twist.
- Crust Variations: For a quick alternative, use a store-bought pie crust. For a richer flavor, consider a graham cracker or gingersnap crust.
- Gluten-Free Option: Use a gluten-free all-purpose flour blend for the crust or opt for a pre-made gluten-free pie crust.
- Dairy-Free Option: Substitute sweetened condensed coconut milk for regular sweetened condensed milk.
- Individual Servings: Bake in ramekins or mini pie pans for adorable individual servings. Reduce baking time accordingly.
Common Mistakes to Avoid
- Overworking the Dough: This leads to a tough, rather than flaky, crust. Mix until just combined.
- Not Chilling the Dough: Chilling the dough allows the butter to solidify, creating pockets of steam during baking for a flaky texture. Don’t skip this step!
- Baking at Constant High Heat: Starting at a high temperature and reducing it helps set the crust and then gently cooks the filling, preventing cracking.
- Undercooking the Filling: An undercooked pie will be runny. Ensure a knife inserted near the center comes out clean.
- Slicing Before Cooling: Patience is key! Slicing a warm pie will result in a messy, unset filling.
Storage & Meal Prep Tips
Leftover Pumpkin Pie should be covered with plastic wrap and refrigerated. It will stay fresh for up to 3-4 days. While it can be frozen (wrapped tightly in plastic wrap and then foil for up to 1 month), the texture of the filling and crust may change slightly upon thawing. To reheat, you can gently warm slices in the microwave for 15-30 seconds, or in a low oven (300°F/150°C) for 10-15 minutes until just warm.
Conclusion
Creating your own homemade Pumpkin Pie is a truly rewarding experience, yielding a dessert far superior to anything you can buy. With a perfectly flaky crust, a rich and creamy filling, and the intoxicating aroma of pumpkin pie spice, this recipe is guaranteed to become a seasonal staple in your home. We encourage you to try this recipe and share your delectable results with us! Tag us in your photos and let us know how your perfect autumnal dessert turned out.
FAQs
Q1: Can I use fresh pumpkin instead of canned puree?
A1: Yes, you can! You’ll need to roast, puree, and drain the excess liquid from fresh pumpkin to achieve a similar consistency to canned puree. Ensure it’s unsweetened.
Q2: My pie crust sometimes cracks when I roll it out. What can I do?
A2: This usually means the dough is too cold or dry. Let it sit at room temperature for a few minutes to soften slightly. If it’s too dry, you can sprinkle a tiny bit of ice water on it and gently knead it in.
Q3: How do I prevent the edges of my pie crust from burning?
A3: If the edges start browning too quickly, you can cover them loosely with aluminum foil for the remainder of the baking time.
Q4: Can I make the pie filling ahead of time?
A4: You can prepare the filling up to 24 hours in advance and store it covered in the refrigerator. Pour it into the crust just before baking.
Q5: What’s the best way to ensure my pie filling sets properly?
A5: Do not undercook it – look for the knife test. Also, patiently allow it to cool completely for at least 2-3 hours, or even overnight, at room temperature or in the refrigerator.