Unlock the Secret to the Perfect Homemade Decadent Chocolate Cake!
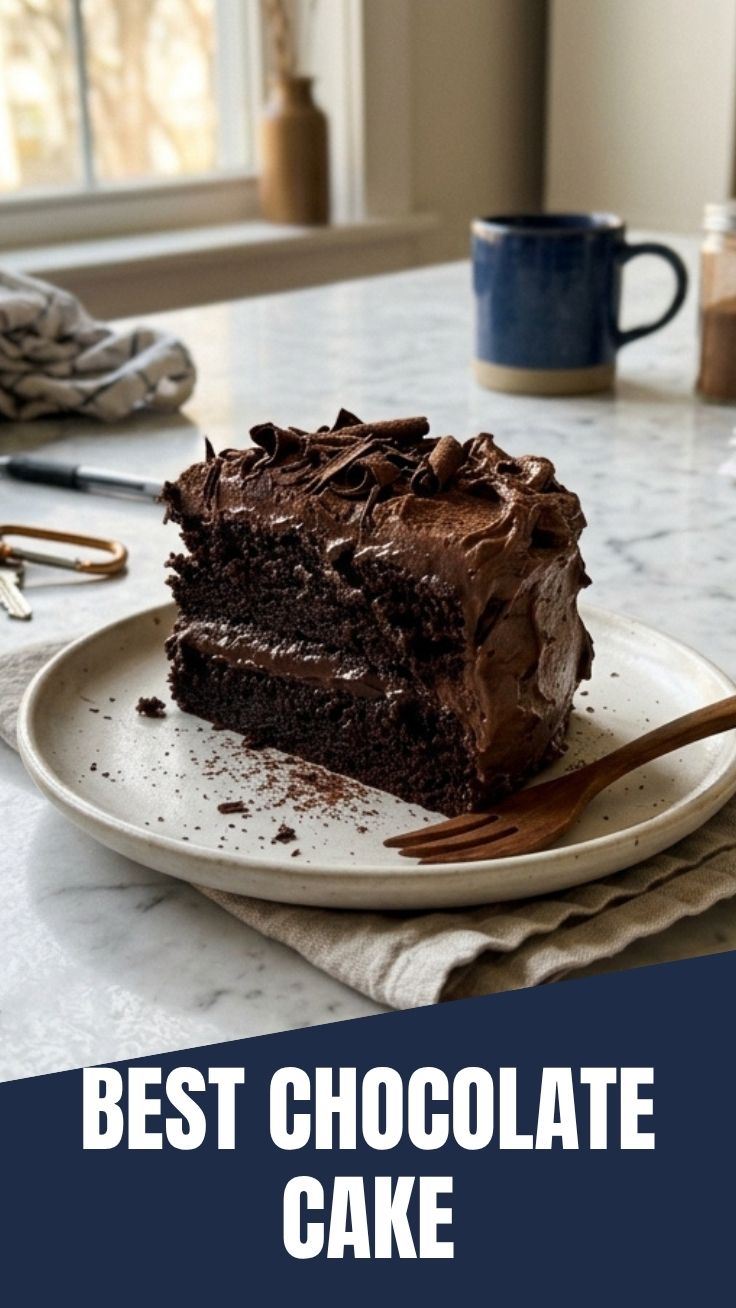
Ever wondered if you could replicate that luxurious, melt-in-your-mouth Chocolate Cake experience right in your own kitchen? The kind that makes you close your eyes and savor every single bite, especially when it’s generously slathered with rich chocolate frosting? The good news is, you absolutely can! Preparing this decadent chocolate cake at home isn’t just about saving money; it’s about crafting a personalized masterpiece, controlling the quality of your ingredients, and infusing every crumb with love. Imagine the aroma filling your home, the anticipation building, and then the pure joy of slicing into a warm, tender cake. This comprehensive guide will equip you with everything you need to bake a show-stopping Chocolate Cake, effortlessly paired with the silkiest chocolate frosting, that will impress even the most discerning dessert connoisseurs.
Ingredients & Kitchen Tools
To embark on this delightful baking journey, gather the following:
Dry Ingredients:
- 2 cups All-Purpose Flour: The structural backbone of our cake.
- ¾ cup Unsweetened Cocoa Powder (Dutch-processed recommended): For that deep, dark chocolate flavor without bitterness.
- 1 ½ teaspoons Baking Soda: Our leavening agent, creating a tender crumb.
- 1 teaspoon Salt: Balances sweetness and enhances flavor.
- 2 cups Granulated Sugar: Sweetness and moisture.
Wet Ingredients:
- 1 cup Whole Milk: Adds richness and tenderness.
- ½ cup Vegetable Oil: For a moist and tender texture.
- 2 large Eggs: Binds ingredients and adds structure.
- 2 teaspoons Vanilla Extract: Essential flavor enhancer.
- 1 cup Boiling Water: Activates cocoa and baking soda, ensuring a moist cake.
For the chocolate frosting:
- 1 cup Unsalted Butter, softened: The creamy base for our frosting.
- 3-4 cups Powdered Sugar, sifted: For sweetness and smooth texture. Adjust to desired consistency and sweetness.
- ¾ cup Unsweetened Cocoa Powder, sifted: For intense chocolate flavor.
- ½ cup Whole Milk or Heavy Cream: For creaminess and consistency.
- 1 teaspoon Vanilla Extract: Complements the chocolate.
- Pinch of Salt: Balances the sweetness.
Kitchen Tools:
- Two 9-inch Round Cake Pans: Or one 9×13 inch rectangular pan.
- Parchment Paper: Prevents sticking.
- Large Mixing Bowls (2): For dry and wet ingredients.
- Whisk: For combining dry ingredients.
- Electric Mixer (Stand or Handheld): Essential for frosting and combining cake batter.
- Rubber Spatula: For scraping bowls and folding.
- Measuring Cups and Spoons: Precision is key in baking.
- Fine-Mesh Sieve: For sifting cocoa powder and powdered sugar to avoid lumps.
- Wire Rack: For cooling the cakes completely.
- Offset Spatula or Butter Knife: For spreading frosting evenly.
Prep Time & Cooking Schedule
- Prep Time: 20-25 minutes
- Bake Time: 30-35 minutes
- Cooling Time (Cakes): 1-2 hours (crucial for easy frosting)
- Frosting Prep Time: 10-15 minutes
Plan to start your cake preparation about 3-4 hours before serving to allow for sufficient cooling. This ensures your cakes are firm enough to handle and frost without crumbling, leading to a much neater and more enjoyable presentation.
Step-by-Step Instructions
1. Preheat & Prep: Preheat your oven to 350°F (175°C). Grease and flour your cake pans, then line the bottoms with parchment paper. This prevents sticking, ensuring a perfect release for your magnificent Chocolate Cake.
2. Combine Dry Ingredients: In a large mixing bowl, whisk together the all-purpose flour, cocoa powder, baking soda, and salt. Make sure there are no lumps.
3. Combine Wet Ingredients (minus boiling water): In another large bowl, whisk together the granulated sugar, whole milk, vegetable oil, eggs, and vanilla extract until well combined and smooth.
4. Incorporate Wet into Dry: Gradually add the dry ingredients to the wet ingredients, mixing on low speed with an electric mixer until just combined. Be careful not to overmix, as this can lead to a tough cake.
5. Add Boiling Water: Slowly pour in the boiling water, mixing on low speed until the batter is smooth. The batter will be thin, but this is normal and contributes to the cake’s moistness.
6. Bake: Divide the batter evenly between the prepared cake pans. Bake for 30-35 minutes, or until a wooden skewer inserted into the center comes out clean.
7. Cool: Let the cakes cool in the pans for 10-15 minutes before inverting them onto a wire rack to cool completely. This full cooling period is essential before you even think about applying that delicious chocolate frosting
8. Prepare the Frosting: While the cakes cool, beat the softened butter in a large bowl with an electric mixer until creamy. Gradually add the sifted powdered sugar and cocoa powder, alternating with milk/cream and vanilla extract, beating until light and fluffy. Add a pinch of salt to enhance the flavor. Adjust consistency with more powdered sugar or milk as needed.
9. Frost & Serve: Once the cakes are completely cool, assemble and frost as desired. Slice and enjoy!
Nutritional Benefits & Advantages
Beyond its undeniable deliciousness, this homemade Chocolate Cake offers a few advantages. Cocoa powder, especially the unsweetened variety, is rich in antioxidants, which are beneficial for heart health and can reduce inflammation. By making it from scratch, you have full control over the sugar content and can opt for high-quality, natural ingredients, avoiding the hydrogenated oils and excessive preservatives often found in store-bought versions. While it’s a treat, the moderate use of whole milk and eggs also contributes essential nutrients like protein and calcium to your indulgent dessert.
Tips, Variations & Cooking Advice
- Coffee Boost: Replace one tablespoon of cocoa powder with instant espresso powder or add a teaspoon of instant coffee granules to the boiling water to intensify the chocolate flavor without making it taste like coffee.
- Buttermilk Swap: For an even more tender crumb, substitute whole milk with buttermilk. The acidity in buttermilk reacts wonderfully with baking soda.
- Ganache Glaze: For an extra luxurious touch, drizzle warm chocolate ganache over the frosted cake.
- Dietary Adaptations:
* Gluten-Free: Substitute all-purpose flour with a 1:1 gluten-free baking blend that contains xanthan gum.
* Dairy-Free: Use almond milk or soy milk and a plant-based butter substitute for both the cake and the frosting.
- Don’t Overmix: Overmixing develops gluten, leading to a tough cake. Mix until just combined.
- Room Temperature Ingredients: Ensure eggs and milk are at room temperature for better emulsion and a smoother batter.
Common Mistakes to Avoid
- Opening the Oven Door Too Early: This can cause the cake to collapse. Resist the urge to peek before the minimum baking time.
- Not Cooling Cakes Completely: Frosting a warm cake is a recipe for disaster! The frosting will melt and slide off.
- Overmixing the Batter: As mentioned, this leads to a dense, chewy cake rather than a light, tender one.
- Using Cold Ingredients for Frosting: Cold butter will not whip up properly, resulting in a lumpy, stiff frosting.
- Ignoring Sifting: Sifting cocoa powder and powdered sugar is crucial to prevent lumps in both the cake and the chocolate frosting.
Storage & Meal Prep Tips
Leftover Chocolate Cake should be stored in an airtight container at room temperature for up to 3-4 days to maintain freshness. If your kitchen is particularly warm, or if your frosting contains perishable ingredients like fresh cream cheese (not in this recipe), refrigeration is advisable. However, chilled cake can dry out, so bring it back to room temperature before serving for the best texture. For longer storage, slices or whole unfrosted cakes can be tightly wrapped in plastic, then aluminum foil, and frozen for up to 2-3 months. Thaw overnight in the refrigerator before frosting or serving.
Conclusion
Mastering the homemade Chocolate Cake might seem daunting, but with this detailed guide, you’re well on your way to baking perfection. From the rich, moist crumb to the velvety smooth chocolate frosting, every element of this recipe is designed for success. We’ve covered everything from ingredient selection to common pitfalls, ensuring your dessert is not just edible, but truly memorable. Don’t wait any longer – gather your ingredients and start baking. Your taste buds (and your loved ones) will thank you! We encourage you to share your baking triumphs in the comments below or tag us on social media!
FAQs
Q1: Can I make this cake in advance?
A1: Yes, the unfrosted cake layers can be baked a day or two ahead, tightly wrapped, and stored at room temperature. The frosting can also be made a day in advance and refrigerated, then brought to room temperature and re-whipped before use.
Q2: What’s the difference between natural cocoa powder and Dutch-processed cocoa powder?
A2: Natural cocoa powder is acidic and reacts with baking soda. Dutch-processed cocoa powder is treated to be less acidic and is often paired with baking powder or used when less leavening is needed. For this recipe, Dutch-processed is recommended for a darker color and milder chocolate flavor.
Q3: My frosting is too thick/thin. How do I fix it?
A3: If your frosting is too thick, add milk or cream, one teaspoon at a time, until it reaches the desired consistency. If it’s too thin, gradually add more sifted powdered sugar until it stiffens up.
Q4: Can I use different sized cake pans?
A4: You can use a 9×13 inch rectangular pan, but adjust the baking time to around 30-40 minutes, checking for doneness with a skewer. For cupcakes, bake for 18-22 minutes.
Q5: How do I ensure my cake is perfectly moist?
A5: The key is not to overbake, use room-temperature ingredients, and precisely measure your wet and dry ingredients. The boiling water in this recipe also contributes significantly to a moist crumb.