Elevate Your Breakfast: Crafting the Perfect Granola Bowl!
Are you tired of bland, sugary breakfast options that leave you feeling sluggish? Imagine starting your day with a vibrant, nutrient-rich bowl that tantalizes your taste buds and fuels your body for hours. This isn’t just any breakfast; it’s a personalized culinary masterpiece, and the best part? You can create it right in your own kitchen! Forget those supermarket aisles overflowing with highly processed cereals. Today, we’re diving into the delightful world of crafting your own Granola, a versatile and immensely satisfying base for countless morning delights. By making your own, you control every ingredient, ensuring a wholesome start to your day while experiencing the simple joy of creating something truly delicious. Get ready to transform your mornings with homemade goodness!
Ingredients & Kitchen Tools
Crafting the perfect granola bowl starts with selecting quality ingredients and having the right tools on hand.
Ingredients:
- Rolled Oats (3 cups): The backbone of your granola; opt for old-fashioned rolled oats, not instant, for the best texture.
- Mixed Nuts & Seeds (1 cup): A blend of almonds, walnuts, pecans, pumpkin seeds, and sunflower seeds adds crunch and nutritional value. Feel free to customize based on your preferences.
- Coconut Flakes (½ cup): Unsweetened large flakes provide a delightful chewiness and subtle tropical flavor.
- Maple Syrup or Honey (½ cup): Natural sweeteners that bind the ingredients and create that signature caramelized crunch.
- Coconut Oil (¼ cup): Melted; helps achieve that desired crispness and adds healthy fats.
- Vanilla Extract (1 tsp): Enhances the overall flavor profile.
- Ground Cinnamon (½ tsp): A warm spice that complements the oats and nuts beautifully.
- Salt (¼ tsp): Just a pinch to balance the sweetness and bring out other flavors.
Dried Fruit (½ cup): (Optional) Adds bursts of sweetness and chewiness. Think dried cranberries, cherries, or diced apricots. Add after* baking.
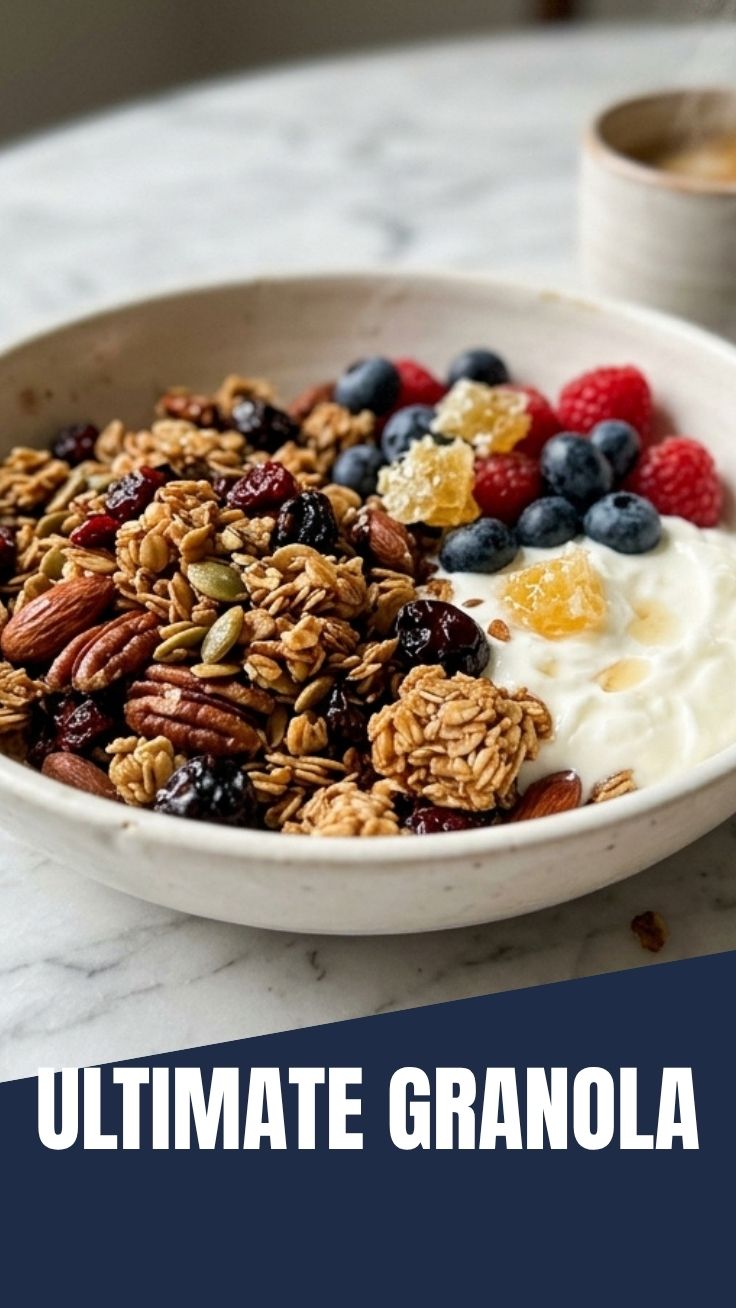
- Fresh Berries & Yogurt: For serving; fresh berries (strawberries, blueberries, raspberries) and Greek yogurt create a vibrant and creamy topping.
Kitchen Tools:
- Large Mixing Bowl: Essential for combining all the ingredients thoroughly.
- Baking Sheet: A large, rimmed baking sheet is perfect for evenly spreading the granola.
- Parchment Paper: Prevents sticking and makes cleanup a breeze.
- Spatula or Wooden Spoon: For mixing and spreading.
- Measuring Cups & Spoons: For accurate ingredient proportions.
Prep Time & Cooking Schedule
This recipe is wonderfully straightforward and fits easily into a busy schedule.
- Prep Time: 10 minutes
- Cook Time: 25-30 minutes
- Cooling Time: 30-60 minutes (crucial for achieving maximum crunch!)
Plan to start your prep about an hour before you want to enjoy your granola, allowing ample time for it to cool and crisp up. The aroma filling your kitchen will be well worth the wait!
Step-by-Step Instructions
Let’s turn those simple ingredients into a breakfast masterpiece!
1. Preheat & Prep: Preheat your oven to 300°F (150°C). Line a large baking sheet with parchment paper. This simple step will save you from sticky situations!
2. Combine Dry Ingredients (Phase 1): In your large mixing bowl, combine the rolled oats, mixed nuts and seeds, coconut flakes, cinnamon, and salt. Give them a good toss to ensure everything is evenly distributed.
3. Whisk Wet Ingredients: In a separate small bowl, whisk together the melted coconut oil, maple syrup (or honey), and vanilla extract until well combined and smooth.
4. Marry Wet & Dry: Pour the wet ingredient mixture over the dry ingredients in the large bowl. Using your spatula or wooden spoon, mix thoroughly until all the dry ingredients are evenly coated. This is where the magic starts to happen! Don’t be afraid to get in there and ensure every oat flake is shimmering with sweetness.
5. Spread & Bake: Spread the coated granola mixture evenly in a single layer on your prepared baking sheet. This even distribution is key for consistent baking and an irresistible crunch. Bake for 25-30 minutes, stirring gently halfway through (around the 15-minute mark) to prevent burning and promote even browning. Keep an eye on it – you’re looking for a beautiful golden-brown color. Baking your own Granola at home means you can tailor the level of crispness to your liking!
6. Cool Completely: Remove the baking sheet from the oven and let the granola cool completely on the baking sheet. This is perhaps the most critical step for achieving that perfect crisp texture. As it cools, the granola will firm up and become delightfully crunchy. If you’re adding dried fruit, stir it in now after the granola has cooled for at least 15 minutes. There’s nothing quite like the satisfaction of creating your own homemade granola.
7. Serve & Enjoy: Once fully cooled, break the granola into desired clusters. Serve generously over Greek yogurt with a vibrant medley of fresh berries.
Nutritional Benefits & Advantages
Beyond its incredible taste, this homemade granola bowl is a powerhouse of nutrition. Oats provide complex carbohydrates, offering sustained energy release and boasting soluble fiber beneficial for digestion and heart health. The nuts and seeds contribute healthy fats (omega-3s!), protein, and a spectrum of vitamins and minerals like Vitamin E, magnesium, and zinc. Coconut flakes add beneficial medium-chain fatty acids (MCTs). When paired with protein-rich Greek yogurt and antioxidant-packed fresh berries, you’re looking at a breakfast that supports satiety, stable blood sugar, and overall well-being. It’s a breakfast that truly nourishes from within.
Tips, Variations & Cooking Advice
- Spice It Up: Experiment with other spices like nutmeg, cardamom, or even a pinch of ginger for different flavor profiles.
- Nut & Seed Swap: Don’t have all the nuts and seeds listed? Feel free to use what you have on hand – walnuts, pecans, cashews, sunflower seeds, chia seeds, or flax seeds all work well.
- Sweetener Alternatives: Agave nectar or brown rice syrup can be used in place of maple syrup or honey.
- Gluten-Free: Ensure you use certified gluten-free rolled oats.
- Dairy-Free/Vegan: This recipe is naturally dairy-free if using coconut oil. Simply serve with plant-based yogurt.
- Chocolate Lover’s Delight: Stir in mini chocolate chips after the granola has cooled for a decadent treat.
- For Extra Clusters: Gently press the granola down with a spatula halfway through baking. And resist the urge to stir it too much once removed from the oven; let it cool undisturbed for larger clusters.
Common Mistakes to Avoid
- Overcrowding the Baking Sheet: Spreading the granola too thick will lead to steaming instead of crisping, resulting in soggy granola. Use two baking sheets if necessary.
- Skipping the Cooling Step: Patience is key! Granola doesn’t get truly crunchy until it’s completely cooled.
- Baking at Too High a Temperature: This can burn the nuts and oats before the granola has a chance to crisp up. Stick to 300°F (150°C).
- Not Stirring During Baking: Essential for even browning and preventing localized burning.
- Adding Dried Fruit Before Baking: Dried fruit will become hard and burnt if baked with the granola. Always add it after cooling.
Storage & Meal Prep Tips
Once your homemade granola is completely cool, store it in an airtight container at room temperature. It will stay fresh and crunchy for up to 2-3 weeks. This makes it an ideal candidate for meal prepping! Make a big batch on the weekend, and you’ll have delicious, healthy breakfasts ready to go for weeks. You can also freeze granola for longer storage (up to 3 months) – just ensure it’s completely cool and stored in a freezer-safe bag or container to prevent freezer burn. No need to thaw; it thaws quickly at room temperature.
Conclusion
There you have it – a simple yet incredibly rewarding guide to crafting your own perfect granola bowl. From the satisfying crunch of the oats and nuts to the bursts of fresh berries, this breakfast is a testament to the fact that healthy eating can be both delicious and incredibly easy to achieve at home. By taking control of your ingredients and embracing the joy of culinary creation, you’re not just making breakfast; you’re cultivating a healthier, happier start to your day. We hope you’ll give this recipe a try and discover the undeniable appeal of Granola made with love. Share your delicious results with us, and don’t forget to explore other delightful breakfast creations that incorporate the wholesome goodness of homemade granola!
FAQs
Q1: Can I make this granola without coconut oil?
A1: Yes, you can substitute coconut oil with another neutral-flavored oil like olive oil, avocado oil, or even melted butter for a different flavor profile.
Q2: How do I get those big clusters of granola?
A2: For bigger clusters, gently press the granola down with a spatula half-way through baking and again just as you remove it from the oven. Then, let it cool completely undisturbed on the baking sheet before breaking it up.
Q3: My granola isn’t crunchy. What went wrong?
A3: The most common reasons for non-crunchy granola are overcrowding the baking sheet (which steams rather than bakes), insufficient baking time, or not allowing it to cool completely. Ensure it’s spread in a thin layer and allow ample cooling time.
Q4: Can I add different dried fruits?
A4: Absolutely! Feel free to experiment with any dried fruits you enjoy – raisins, chopped dates, dried mango, or apricots are all wonderful additions. Just remember to add them after the granola has cooled to prevent them from becoming hard or burning.