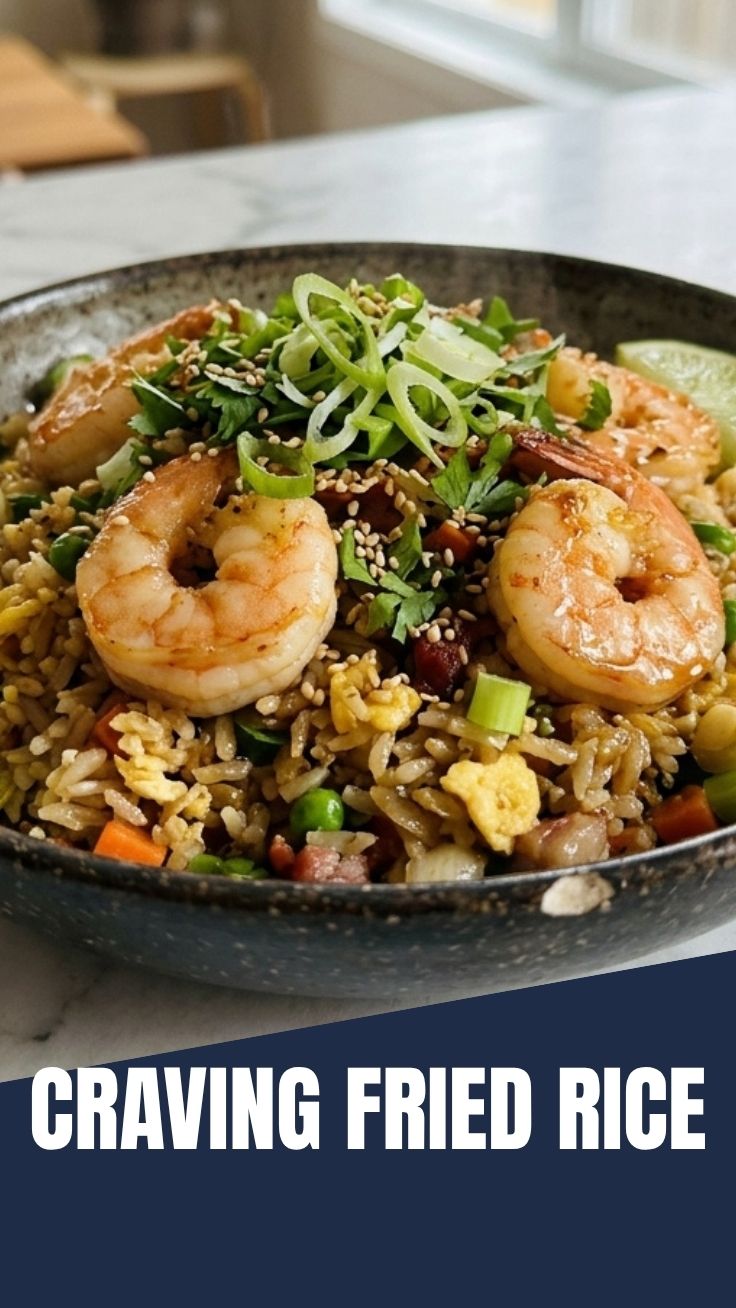
Unlock the Secret to Restaurant-Quality Fried Rice at Home!
Ever wondered how your favorite takeout spot creates that perfect, flavorful fried rice? What if I told you that achieving that same deliciousness, right in your own kitchen, is not only possible but surprisingly easy? Today, we’re diving deep into the world of homemade Shrimp Fried Rice – a dish that’s a true crowd-pleaser and offers a fantastic way to utilize leftover rice and produce. Forget soggy, bland attempts; this recipe is designed to help you create a vibrant, aromatic, and perfectly textured fried rice that will impress even the most discerning palates. And for those seeking a quicker, equally delightful option, we’ll also touch upon how to master an Easy Shrimp Fried Rice, proving that gourmet flavors don’t always require hours in the kitchen.
Ingredients & Kitchen Tools
To embark on your culinary journey to the perfect Shrimp Fried Rice, gather these essentials:
- Large Skillet or Wok: Essential for even heat distribution and stir-frying. A wok is traditional, but a large, deep skillet works well.
- Spatula: For stirring and tossing ingredients. A flat-bottomed wok spatula is ideal.
- Cutting Board & Knife: For prepping vegetables and shrimp.
- Measuring Cups & Spoons: For accurate ingredient quantities.
2 cups Cooked Long-Grain Rice, cold: Day-old rice is crucial* for the best texture; freshly cooked rice can lead to a mushy result. Basmati or jasmine work wonderfully.
- 1 tbsp Vegetable Oil (or preferred cooking oil): For stir-frying.
- 1/2 lb Fresh Shrimp, peeled and deveined: Choose medium to large shrimp for a satisfying bite.
- 1/2 cup Frozen Peas and Carrots, thawed: Adds color, sweetness, and nutrition.
- 1/4 cup Diced Yellow Onion: Provides a foundational aromatic flavor.
- 2 cloves Garlic, minced: Essential for that characteristic fried rice aroma.
- 1 tbsp Fresh Ginger, grated (optional): Elevates the flavor profile with a zesty, warm note.
- 2 Large Eggs, whisked: Creates savory ribbons of egg throughout the rice.
- 2 tbsp Soy Sauce, or to taste: The primary seasoning, providing umami and salt. Use low-sodium if preferred.
- 1 tsp Sesame Oil: Adds a nutty, aromatic finish.
- 1/4 tsp White Pepper (or black pepper): For a subtle depth of flavor.
- Green Onions, chopped (for garnish): Adds freshness and a vibrant pop of color.
Prep Time & Cooking Schedule
- Prep Time: 15 minutes (assuming cold, day-old rice is ready)
- Cook Time: 10-12 minutes
- Total Time: Approximately 25-27 minutes
The beauty of this dish lies in its speed! Once your ingredients are prepped, the cooking process is rapid. Ensure your rice is thoroughly chilled; warm rice will steam rather than fry, resulting in a less desirable texture. Have all your ingredients chopped and measured before you start cooking, as stir-frying requires quick movements.
Step-by-Step Instructions
1. Prepare the Shrimp: Pat the peeled and deveined shrimp dry with paper towels. Season lightly with salt and white pepper. This helps develop flavor and ensures a good sear.
2. Scramble the Eggs: Heat ½ tablespoon of vegetable oil in your wok or skillet over medium-high heat. Pour in the whisked eggs and quickly scramble them until just set but still soft. Remove from the pan and set aside.
3. Cook the Shrimp: Add the remaining ½ tablespoon of vegetable oil to the hot pan. Add the seasoned shrimp, spreading them in a single layer. Cook for 1-2 minutes per side, or until pink and opaque. Do not overcook. Remove the shrimp from the pan and set aside with the eggs.
4. Sauté Aromatics: Add a tiny splash more oil if needed. Add the diced yellow onion and sauté for 1-2 minutes until softened. Stir in the minced garlic and grated ginger (if using) and cook for another 30 seconds until fragrant, being careful not to burn the garlic.
5. Add Vegetables: Toss in the thawed peas and carrots. Stir-fry for 1-2 minutes until slightly tender-crisp.
6. Incorporate Rice: Add the cold, day-old rice to the pan. Using your spatula, break up any clumps. Stir-fry constantly for 3-5 minutes, allowing the rice to heat through and develop a slightly toasted texture. This is where the magic of Shrimp Fried Rice really begins to shine. Ensure even heat distribution.
7. Season and Combine: Push the rice and vegetables to one side of the pan, creating a well in the center. Pour in the soy sauce and sesame oil into the well, letting it heat for a few seconds before stirring it into the rice. Add the cooked shrimp and scrambled eggs back into the pan. Stir everything together until well combined and heated through. For an even quicker weeknight meal, this is essentially how to make an Easy Shrimp Fried Rice, especially if you have pre-cooked rice.
8. Garnish and Serve: Taste and adjust seasoning if necessary. Garnish generously with chopped green onions before serving.
Nutritional Benefits & Advantages
This homemade Shrimp Fried Rice offers a balanced meal. Shrimp is an excellent source of lean protein, low in calories, and rich in selenium and B vitamins. The inclusion of vegetables like peas and carrots adds dietary fiber, vitamins A and C, and essential minerals. Using eggs provides additional high-quality protein and choline. By making it at home, you control the amount of oil and sodium, making it a healthier alternative to many takeout versions. It’s also a fantastic way to incorporate more vegetables into your diet in a delicious and satisfying way.
Tips, Variations & Cooking Advice
- Spice it Up: Add a dash of sriracha or a pinch of red pepper flakes with the garlic for a kick.
- Protein Swap: Don’t have shrimp? Chicken, pork, or tofu can easily be substituted. Cook them similarly before adding the rice.
- Extra Veggies: Feel free to add other quick-cooking vegetables like diced bell peppers, corn, or bean sprouts.
- Gluten-Free: Use tamari instead of regular soy sauce to make this dish gluten-free.
- Flavor Boost: A teaspoon of oyster sauce can add an extra layer of umami to the finished dish.
- Crispy Edges: For extra crispy rice, let it sit undisturbed in the hot pan for an extra minute or two towards the end, creating a slightly browned crust.
Common Mistakes to Avoid
- Using Freshly Cooked Rice: The #1 culprit for soggy fried rice. Always use cold, day-old rice. The grains are firmer and less likely to clump.
- Overcrowding the Pan: Cooking in batches if necessary, especially if you have a smaller pan. Overcrowding lowers the pan’s temperature and results in steaming rather than frying.
- Overcooking Shrimp: Shrimp cooks very quickly. Overcooked shrimp becomes rubbery and unpleasant.
- Lack of Heat: Fried rice needs high heat for that characteristic “wok hei” (breath of the wok) flavor. Don’t be afraid to keep the heat up.
- Undersalting: Taste as you go! Fried rice needs proper seasoning to shine.
Storage & Meal Prep Tips
Leftover Shrimp Fried Rice can be stored in an airtight container in the refrigerator for up to 3-4 days. It’s an excellent meal prep option for lunches! To reheat, gently warm in a microwave or, ideally, stir-fry again in a hot skillet with a tiny splash of oil until heated through. This method helps maintain the desired texture by re-crisping the rice. Freezing is not recommended, as the texture of the rice and shrimp can degrade significantly upon thawing and reheating.
Conclusion
Mastering homemade Shrimp Fried Rice is a truly rewarding culinary achievement. With its vibrant colors, irresistible aroma, and perfect balance of flavors, it’s a dish that brings comfort and joy to any meal. This comprehensive guide has equipped you with all the knowledge and techniques to create a version that rivals your favorite takeout. So go ahead, gather your ingredients, and get ready to impress your taste buds. And remember, for those busy weeknights, perfecting an Easy Shrimp Fried Rice is just as satisfying and achievable. Happy cooking!
FAQs
Q: Can I use brown rice for fried rice?
A: Yes, you can use brown rice, but ensure it’s day-old and cold, just like white rice. Brown rice has a different texture and may require slightly longer cooking to heat through.
Q: What’s the best way to prevent the rice from sticking to the pan?
A: Use enough oil, ensure your pan is properly seasoned or non-stick, and most importantly, use high heat to create a “fried” rather than “steamed” effect. Cold, day-old rice also significantly reduces stickiness.
Q: Can I prepare the ingredients ahead of time?
A: Absolutely! Chopping vegetables and dicing onions can be done a day in advance. Whisking eggs and peeling shrimp can also be done a few hours prior. This makes the actual cooking process even faster.
Q: My fried rice often turns out mushy. What am I doing wrong?
A: The most common culprits are using warm or freshly cooked rice, overcrowding the pan, or not using enough heat. Always opt for cold, day-old rice and cook in batches if your pan is not large enough to accommodate all ingredients comfortably.
Q: How can I adjust the saltiness?
A: Start with the recommended amount of soy sauce, then taste and add more if needed. Remember that soy sauce is quite salty. If needed, a pinch of sugar can help balance out excessive saltiness.