Unleash Your Inner Confectioner: Crafting Perfect Candy Apples at Home
Ever wondered how those gloriously shiny, ruby-red Candy Apples, often seen at fairs and carnivals, achieve their delectable crunch and vibrant hue? While store-bought versions are a delightful treat, there’s an undeniable satisfaction in crafting these timeless confections in your own kitchen. Beyond the sheer joy of creating, preparing Candy Apples at home allows for unparalleled control over ingredients, ensuring a personalized touch and a truly superior taste experience. Say goodbye to artificial flavors and hello to the pure, unadulterated pleasure of a homemade classic. And for those who prefer a creamier, chewier delight, we’ll also touch upon the magic of homemade caramel apples. This guide will equip you with all the knowledge needed to master both these iconic treats, transforming simple apples into stunning edible art.
Ingredients & Kitchen Tools
To embark on your sweet apple adventure, gather these essentials:
- Apples (6-8 medium, firm varieties like Granny Smith or Honeycrisp): These provide the perfect tart counterpoint to the sweet coating. Choosing firm apples is crucial for a good bite.
- Granulated Sugar (2 cups): The foundation of our candy coating.
- Light Corn Syrup (1 cup): Prevents crystallization, ensuring a smooth, glossy finish for your Candy Apples.
- Water (1/2 cup): Helps dissolve the sugar and corn syrup.
- Red Food Coloring (1-2 tsp, gel preferred): For that iconic vibrant red. Adjust to your desired intensity.
- Cinnamon (1/2 tsp, optional): Adds a subtle warmth and aromatic complexity.
- Wooden Skewers or Lollipop Sticks (6-8): Essential for handling and eating your apples.
- Heavy-Bottomed Saucepan (3-4 quart): Distributes heat evenly, preventing scorching.
- Candy Thermometer: Absolutely crucial for achieving the perfect candy consistency (hard crack stage).
- Parchment Paper or Silicone Mat: For cooling the apples without sticking.
- Baking Sheet: To hold the parchment paper or silicone mat.
- Substitutions: For a gourmet twist, consider adding a dash of vanilla extract to the candy mixture. You can also experiment with different food colorings for unique variations.
Prep Time & Cooking Schedule
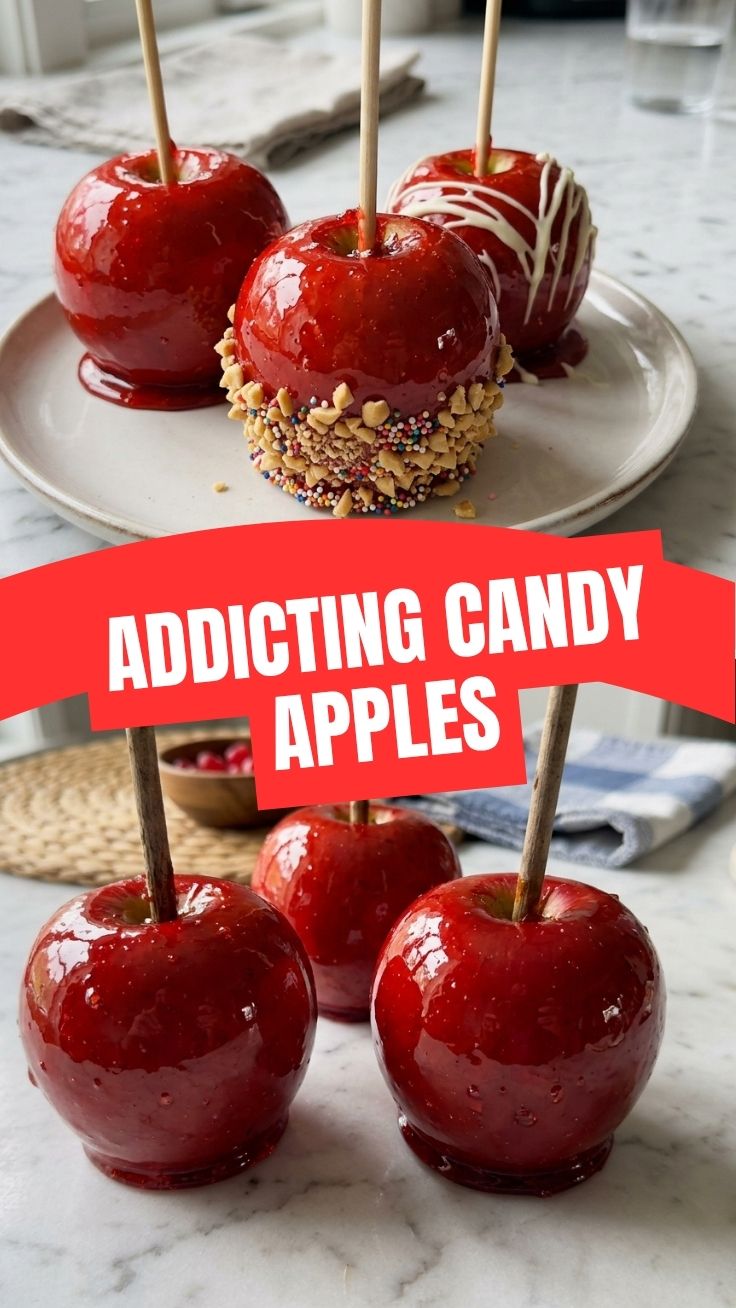
Preparation for your Candy Apples and caramel apples typically involves:
- Prep Time: 20-30 minutes (washing apples, inserting sticks, preparing the workstation).
- Cook Time: 15-25 minutes (boiling the candy mixture).
- Cooling Time: 30-60 minutes (until the candy sets completely).
It’s advisable to have all your ingredients measured and tools ready before you begin cooking the candy mixture, as it moves quickly once heated. This ensures a smooth and stress-free process, especially when working with hot sugar.
Step-by-Step Instructions
1. Prepare the Apples: Thoroughly wash and dry your apples. Remove any stems. Insert a wooden skewer or lollipop stick firmly into the core of each apple, about two-thirds of the way through. This provides a secure handle for dipping.
2. Grease Your Surface: Line a baking sheet with parchment paper or a silicone mat and lightly grease it with non-stick spray. This prevents the candy from sticking as it cools.
3. Combine Ingredients: In your heavy-bottomed saucepan, combine the granulated sugar, light corn syrup, and water. Stir gently to combine.
4. Boil the Mixture: Place the saucepan over medium-high heat. Attach your candy thermometer to the side of the pan, ensuring the bulb is submerged in the mixture but not touching the bottom. Bring the mixture to a boil without stirring.
5. Achieve Hard Crack Stage: Continue to boil the mixture, without stirring, until the candy thermometer registers 300-310°F (149-154°C). This is the “hard crack” stage, essential for the crisp texture of Candy Apples. If you were making caramel apples, you would pull the mixture off at a lower temperature for a chewier consistency.
6. Add Flavor and Color: Once the hard crack stage is reached, carefully remove the saucepan from the heat. Stir in the red food coloring and optional cinnamon. Be cautious, as the mixture will be extremely hot.
7. Dip the Apples: Working quickly, carefully dip each apple into the hot candy mixture, tilting the pan and rotating the apple to ensure it’s fully coated. Let any excess drip off back into the pan.
8. Cool and Set: Place the dipped apples onto your prepared baking sheet. Allow them to cool completely at room temperature for at least 30-60 minutes, or until the candy is firm and shiny. Avoid refrigerating immediately, as this can cause the candy to become sticky.
Nutritional Benefits & Advantages
While Candy Apples and caramel apples are undeniably treats, the star ingredient, the actual apple, offers a wealth of nutritional benefits. Apples are a great source of dietary fiber, promoting digestive health and helping to regulate blood sugar levels. They are rich in vitamins, particularly Vitamin C, an antioxidant crucial for immune function, and various B vitamins. Furthermore, apples contain powerful antioxidants like flavonoids that contribute to overall well-being. Enjoying these confections in moderation can be a delightful way to incorporate fruit into your diet.
Tips, Variations & Cooking Advice
- Temperature Control is Key: Never guess with candy making! A reliable candy thermometer is your best friend for perfect results.
- Wax Removal: If your apples have a waxy coating, briefly dip them in boiling water for 10-15 seconds, then dry thoroughly before dipping. This helps the candy adhere better.
- Flavor Innovations: For a touch of sophistication, consider adding a few drops of almond extract or peppermint extract to your candy coating.
- Topping Extravaganza: Before the candy sets completely, you can roll your Candy Apples in sprinkles, chopped nuts, shredded coconut, or even mini chocolate chips for added texture and flavor. This is also a popular technique for caramel apples.
- Smaller Portions: For a more manageable treat, use smaller apples or cut larger apples into wedges before dipping.
Common Mistakes to Avoid
- Not Using a Candy Thermometer: This is the most common reason for sticky, soft, or crystalized candy. Invest in one!
- Stirring the Candy After Boiling: Once the mixture boils, stirring can cause sugar crystals to form, resulting in a grainy texture.
- Dipping Wet Apples: Any moisture on the apples will prevent the candy from adhering properly, leading to a patchy coating.
- Humidity: High humidity can make the candy soft and sticky. Choose a dry day for your candy-making adventure if possible.
- Old Apples: Use fresh, firm apples. Overripe or soft apples won’t hold up well to the coating process.
Storage & Meal Prep Tips
Store your finished Candy Apples at room temperature in an airtight container for up to 2-3 days. Avoid refrigerating, as it can cause the candy to sweat and become sticky. If you need to store them for longer, it’s best to prepare them fresh. Unfortunately, caramel apples and Candy Apples don’t typically lend themselves well to meal prepping due to their perishable nature.
Conclusion
Mastering the art of homemade Candy Apples is a rewarding culinary journey that brings the magic of the fair right into your kitchen. With a reliable candy thermometer and a little patience, you’ll be creating glossy, crunchy delights in no time. Whether you prefer the vibrant sweetness of a Candy Apple or the rich chewiness of a caramel apple, the satisfaction of creating these treats from scratch is truly unmatched. So, gather your ingredients, follow these steps, and prepare to impress your friends and family with these classic confections. Share your delicious creations and tell us your favorite variations in the comments below!
FAQs
Q: Why is my candy sticky after it cools?
A: This usually happens if the candy mixture didn’t reach the hard crack stage (300-310°F). Make sure your candy thermometer is accurate and that you’re not taking the mixture off the heat too soon. High humidity can also contribute to stickiness.
Q: Can I use different types of food coloring?
A: Yes, you can experiment with various gel food colorings to create different colored Candy Apples. Liquid food coloring can be used, but you might need more of it.
Q: How do I prevent the candy from sliding off the apples?
A: Ensure your apples are thoroughly washed and completely dry before dipping. Any residual wax or moisture can prevent the candy from adhering properly.
Q: Can I make a smaller batch?
A: Yes, you can halve the recipe for a smaller batch. Just be sure to use a smaller saucepan, but maintain the proportions of the ingredients.
Q: What’s the difference between a Candy Apple and a caramel apple?
A: Candy Apples feature a hard, glossy sugar shell, while caramel apples are coated in a soft, chewy caramel. The primary difference in preparation lies in the final temperature the sugar mixture reaches.