Master the Perfect Roast Chicken: Your Ultimate Guide to Juiciness and Flavor
Ever wondered how to achieve that perfectly golden, crispy-skinned, and unbelievably juicy Roast Chicken at home? Forget dry, bland poultry! This comprehensive guide will transform your kitchen into a culinary haven, proving that mastering delicious Chicken Recipes is not just for professional chefs. Preparing a whole Roast Chicken at home isn’t just about the meal; it’s about the aroma filling your house, the joy of sharing a wholesome dish, and the satisfaction of knowing exactly what goes into your food. With our step-by-step approach, you’ll unlock the secrets to a succulent and flavorful roast every single time, making it a cornerstone of your family’s favorite meals.
Ingredients & Kitchen Tools
To embark on this culinary adventure, gather the following:
Ingredients:
- 1 Whole Organic Chicken (4-5 lbs): Opt for organic for better flavor and ethical farming practices. Pastured chickens yield the most flavorful results.
- 2 tbsp Olive Oil: Extra virgin olive oil adds a subtle fruity note and helps with crisping the skin.
- 2 tsp Sea Salt: Essential for seasoning and drawing out moisture from the skin for crispness.
- 1 tsp Black Pepper (freshly ground): Adds a pungent, aromatic kick.
- 1 tbsp Fresh Rosemary (chopped): Earthy, pine-like aroma; complements poultry beautifully.
- 1 tbsp Fresh Thyme (chopped): Slightly floral and peppery; another classic pairing with chicken.
- 1 Lemon: Provides bright, acidic notes and helps tenderize the meat.
- 1 head Garlic: Adds a deep, savory aroma.
- 1 Onion (large, quartered): Creates a flavorful bed for the chicken and adds moisture.
- 1 cup Chicken Broth (low sodium): Used for basting and creating a delicious pan sauce.
Kitchen Tools:
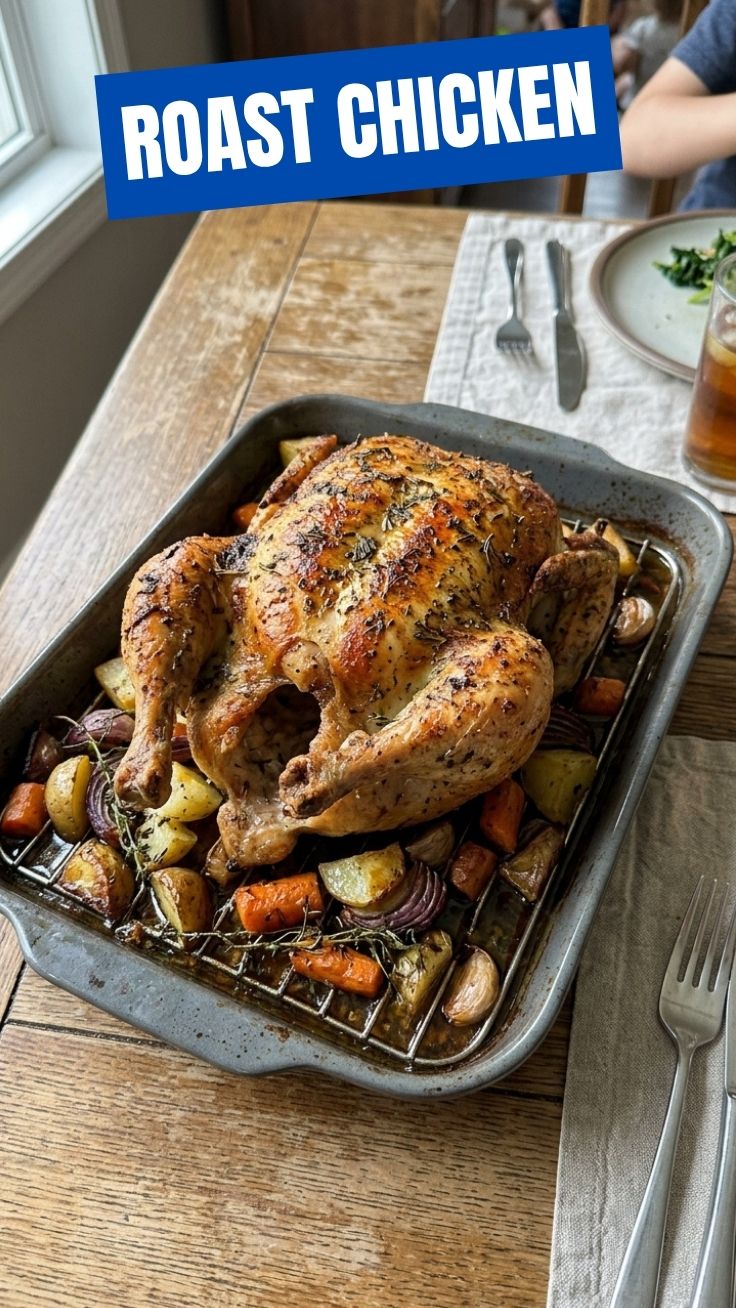
- Roasting Pan with Rack: Essential for air circulation around the chicken, ensuring even cooking and crispy skin.
- Meat Thermometer: Non-negotiable for ensuring the chicken is cooked to a safe internal temperature (165°F/74°C).
- Large Bowl: For preparing the herb rub.
- Twine: To truss the chicken, which helps it cook evenly and stay moist.
- Basting Brush: For applying broth or pan drippings during cooking.
- Cutting Board & Sharp Knife: For prepping ingredients and carving the cooked chicken.
Prep Time & Cooking Schedule
Planning is key for a stress-free cooking experience.
- Prep Time: 20 minutes (Includes washing, drying, trussing, and seasoning.)
- Resting Time: 15-20 minutes (Crucial for juicy results; allows juices to redistribute.)
- Marinating Time (Optional): 30 minutes to overnight (For deeper flavor penetration, though not strictly necessary for a delicious roast.)
- Cook Time: 1 hour 15 minutes to 1 hour 45 minutes (Depending on chicken weight and oven calibration.)
To help you plan, aim to start your prep about 2 hours before you want to serve, allowing ample time for cooking and resting.
Step-by-Step Instructions
Follow these detailed steps to achieve a mouth-watering Roast Chicken:
1. Prepare the Chicken: Remove the chicken from its packaging. Pat it thoroughly dry with paper towels – this is crucial for crispy skin! Remove giblets from the cavity. Place the quartered lemon, garlic head, and onion inside the chicken cavity. This infuses the chicken with incredible aromatics from the inside out. Don’t worry, these aren’t meant for eating, just for flavor.
2. Seasoning: In a small bowl, combine olive oil, sea salt, black pepper, rosemary, and thyme. Rub this aromatic mixture all over the chicken, making sure to get under the skin of the breast as well for maximum flavor.
3. Trussing: (Optional but recommended) Using kitchen twine, tie the legs together. This helps the chicken hold its shape and cook more evenly. Tuck the wing tips under the breast to prevent them from burning.
4. Preheat Oven & Arrange: Preheat your oven to 400°F (200°C). Place the chicken, breast-side up, on a rack in your roasting pan. Pour the chicken broth into the bottom of the pan – this prevents drippings from burning and creates steam for moisture.
5. Roast: Roast for 1 hour 15 minutes to 1 hour 45 minutes, or until a meat thermometer inserted into the thickest part of the thigh (without touching bone) reads 165°F (74°C). For even browning, you may need to rotate the pan halfway through.
6. Basting: While not strictly necessary, basting with the pan juices every 20-30 minutes can add an extra layer of flavor to your Chicken Recipes.
7. Rest: Once the chicken reaches temp, remove it from the oven, tent it loosely with foil, and let it rest for 15-20 minutes. This resting period is critical for the juices to redistribute throughout the meat, ensuring every bite is succulent.
8. Carve & Serve: Carve the chicken and serve immediately with your favorite sides.
Nutritional Benefits & Advantages
This Roast Chicken offers a powerhouse of nutrition. Chicken is an excellent source of lean protein, essential for muscle repair and growth. It’s rich in Niacin (Vitamin B3) which aids in energy metabolism, and Selenium, a powerful antioxidant. The herbs – rosemary and thyme – are packed with anti-inflammatory compounds and antioxidants. Plus, by roasting at home, you control the ingredients, avoiding processed additives and excessive sodium often found in store-bought alternatives. It’s a wholesome meal that truly nourishes.
Tips, Variations & Cooking Advice
- Spatchcocking: For faster, more even cooking and even crispier skin, try spatchcocking (butterflying) the chicken before roasting.
- Herb Variations: Experiment with sage, oregano, or marjoram for different flavor profiles.
- Spice Rub: Add a teaspoon of paprika, cayenne, or garlic powder to the herb rub for an extra kick.
- Vegetable Bed: Roast the chicken directly on a bed of root vegetables like carrots, potatoes, and parsnips to absorb the delicious pan drippings.
- Butter Under Skin: For extra rich flavor and crispiness, lightly spread herbed butter under the breast skin before roasting.
- Dietary Adaptations: This recipe is naturally gluten-free and dairy-free (if using olive oil).
Common Mistakes to Avoid
- Not Drying the Chicken: This is the number one culprit for soggy skin. Pat, pat, pat!
- Under-seasoning: Chicken needs generous seasoning, inside and out. Don’t be shy with salt and pepper.
- Overcooking: The biggest mistake! Always use a meat thermometer. Overcooked chicken is dry and stringy.
- Not Trussing: While optional, not trussing can lead to uneven cooking, with breast meat drying out before the thighs are done.
- Skipping the Rest: Resting allows the juices to redistribute, leading to a much juicier chicken. Impatience will be rewarded with dry meat.
Storage & Meal Prep Tips
Leftover Roast Chicken is a treasure!
- Refrigeration: Store carved chicken in an airtight container in the refrigerator for up to 3-4 days.
- Freezing: For longer storage, shred the chicken and freeze in airtight containers or freezer bags for up to 2-3 months.
- Reheating: Reheat gently in the oven at 300°F (150°C) with a splash of broth to prevent drying out, or briefly in the microwave.
- Meal Prep Ideas: Use leftover chicken for sandwiches, salads, quesadillas, soups, or even stir-fries.
Conclusion
Congratulations! You’ve just unlocked the secrets to a perfectly cooked, incredibly flavorful Roast Chicken. This isn’t just about following a recipe; it’s about building confidence in your kitchen and creating memorable meals. Mastering this one dish opens the door to countless other delicious Chicken Recipes and will undoubtedly become a family favorite. We encourage you to try this ultimate guide to Roast Chicken and share your culinary successes! What are your favorite sides to serve with roasted chicken? Let us know in the comments below!
FAQs
Q1: How do I get extra crispy skin?
A1: Ensure your chicken is thoroughly patted dry before seasoning. Roasting at a higher initial temperature (like 425°F/220°C for 15-20 minutes) before reducing to 375°F (190°C) can also help, as can basting with olive oil instead of butter for the last 30 minutes.
Q2: Can I use frozen chicken?
A2: Yes, but ensure it’s completely thawed in the refrigerator before beginning the recipe. A partially frozen chicken will cook unevenly.
Q3: My chicken breast is always dry. What am I doing wrong?
A3: The most common culprit is overcooking. Use a meat thermometer to ensure the breast reaches 165°F (74°C) and no higher. Trussing also helps the breast cook at a similar rate to the thighs.
Q4: Can I make a gravy from the pan drippings?
A4: Absolutely! After removing the chicken, pour the pan drippings into a saucepan. Skim off excess fat. Whisk in a tablespoon of flour or cornstarch slurry until thickened. Season to taste for a delicious homemade gravy.
Q5: What if I don’t have a roasting rack?
A5: You can create a makeshift rack by forming aluminum foil into several tight balls or by laying thick slices of onion, carrots, or celery on the bottom of the pan to elevate the chicken.