Bake the Best Pumpkin Pie You’ve Ever Tasted
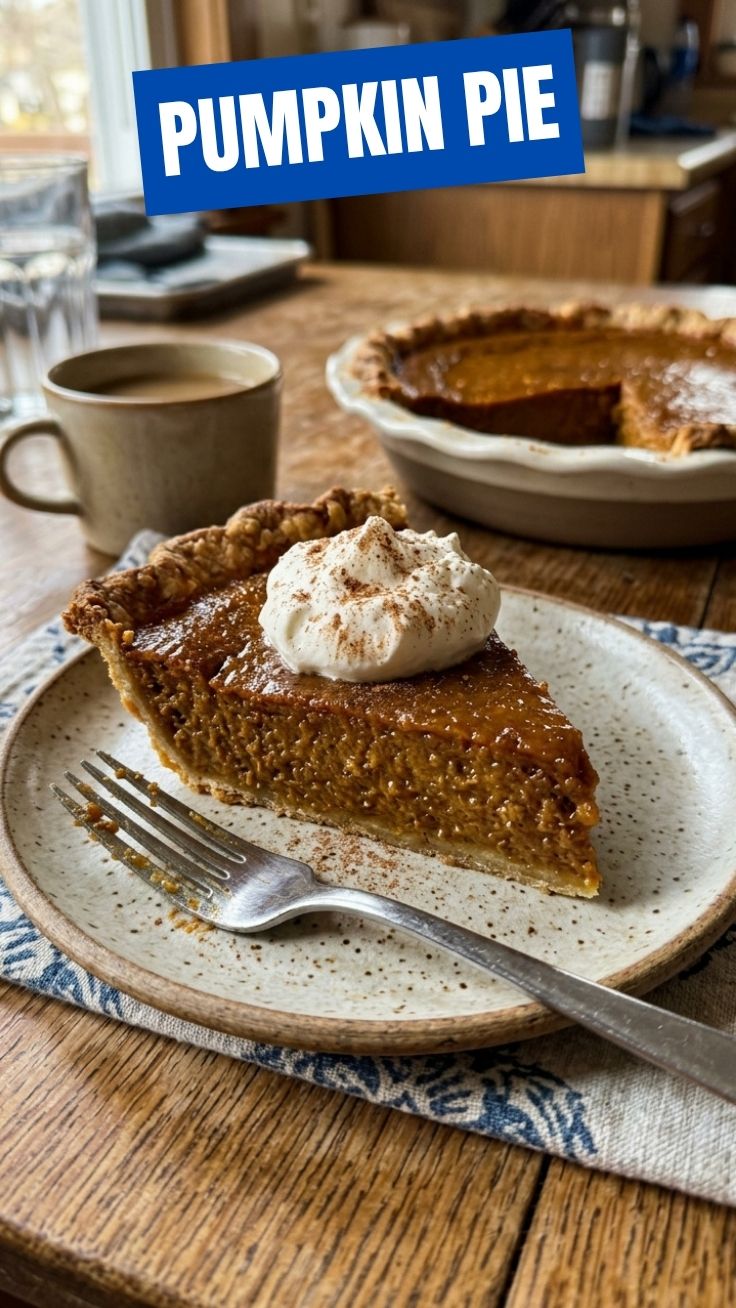
Imagine a golden-brown crust cradling a velvety smooth, spiced custard, its aroma filling your home with warmth and nostalgia. Does anything evoke the joy of autumn and festive gatherings more than a perfectly baked Pumpkin Pie? While store-bought options are convenient, there’s an undeniable magic in creating this classic dessert from scratch. Not only does it allow you to control the quality of ingredients, but it also brings a deeper sense of satisfaction and pride. This blog post will guide you through crafting a show-stopping Pumpkin Pie that will undoubtedly become a treasured addition to your Thanksgiving Desserts repertoire. Get ready to impress your family and friends with a pie that tastes as good as it looks.
Ingredients & Kitchen Tools
Crafting the perfect pie requires specific ingredients and tools. Here’s what you’ll need:
- For the Crust:
* 2 ½ cups all-purpose flour: The base for a flaky, tender crust.
* 1 teaspoon salt: Enhances the flavor of the crust.
* 1 cup (2 sticks) unsalted butter, very cold and cut into cubes: Essential for flaky layers.
* ½ cup ice water: Helps bind the dough without over-working the gluten.
* Optional: 1 tablespoon sugar: For a slightly sweeter crust.
- For the Filling:
* 1 (15-ounce) can pumpkin purée: Not pumpkin pie filling; ensure it’s 100% pumpkin.
* 1 cup heavy cream: Adds richness and a silky texture.
* ½ cup packed light brown sugar: Provides a molasses-rich sweetness.
* ¼ cup granulated sugar: Balances the sweetness.
* 2 large eggs, plus 1 egg yolk: Binds the filling and adds richness.
* 1 ½ teaspoons ground cinnamon: Classic warm spice.
* ½ teaspoon ground ginger: Adds a zesty warmth.
* ¼ teaspoon ground nutmeg: Aromatic and slightly sweet.
* ⅛ teaspoon ground cloves: Intense, pungent spice; use sparingly.
* ½ teaspoon salt: Balances the sweetness and spices.
* Optional: ½ teaspoon vanilla extract: Enhances the overall flavor profile.
- Kitchen Tools:
* 9-inch pie plate: Standard size for a pie.
* Large mixing bowls: For combining ingredients.
* Whisk: For blending the filling.
* Rolling pin: To roll out the pie crust.
* Pastry blender or food processor (optional): For cutting butter into flour efficiently.
* Measuring cups and spoons: For precise ingredient amounts.
* Plastic wrap: For chilling the dough.
* Pie weights or dried beans: To blind bake the crust.
Prep Time & Cooking Schedule
Planning is key for a stress-free baking experience. This recipe benefits from chilling, so factor that into your schedule.
- Crust Prep Time: 20 minutes
- Crust Chill Time: 30 minutes (minimum), up to 2 days
- Filling Prep Time: 15 minutes
- Baking Time: 50-60 minutes
- Cooling Time: At least 3 hours, preferably overnight
Begin by preparing your pie dough in advance. This allows the gluten to relax, resulting in a more tender crust. The day of, you can focus on making the filling and baking. Start baking at least 4-5 hours before serving to allow ample cooling time, which is crucial for the filling to set properly. For ultimate convenience, bake your Pumpkin Pie the day before your gathering.
Step-by-Step Instructions
Follow these detailed steps to create your masterpiece:
1. Prepare the Pie Crust: In a large bowl, whisk together the flour and salt (and sugar, if using). Cut in the very cold butter using a pastry blender or your fingertips until the mixture resembles coarse crumbs with some pea-sized butter pieces remaining. Gradually add ice water, one tablespoon at a time, mixing until just combined. Be careful not to over-mix. Form the dough into a disc, wrap in plastic, and refrigerate for at least 30 minutes.
2. Blind Bake the Crust (Optional, but Recommended): On a lightly floured surface, roll out the chilled dough into a 12-inch circle. Carefully transfer it to your 9-inch pie plate, trimming and crimping the edges. Prick the bottom with a fork. Line with parchment paper and fill with pie weights or dried beans. Bake at 400°F (200°C) for 15 minutes. Remove weights and parchment, then bake for another 5-10 minutes until lightly golden. This step helps prevent a soggy bottom.
3. Prepare the Filling: In a large bowl, whisk together the pumpkin purée, heavy cream, brown sugar, granulated sugar, eggs, and egg yolk until smooth. Add the cinnamon, ginger, nutmeg, cloves, salt, and vanilla extract (if using), whisking until thoroughly combined.
4. Assemble and Bake: Pour the pumpkin filling into the blind-baked (or unbaked, if skipping blind bake) pie crust. Carefully transfer the pie to the preheated oven.
5. Bake the Pumpkin Pie: Bake at 425°F (220°C) for 15 minutes, then reduce the oven temperature to 350°F (175°C) and continue baking for 35-45 minutes, or until the edges are set and the center jiggles only slightly when gently shaken. If the crust edges begin to brown too quickly, cover them loosely with aluminum foil. This careful temperature control is crucial for exquisite Thanksgiving Desserts.
6. Cool Completely: Remove the pie from the oven and place it on a wire rack to cool completely for at least 3 hours. Do not slice when warm, as the filling needs time to set properly.
Nutritional Benefits & Advantages
Beyond its delicious taste, Pumpkin Pie offers some notable nutritional upsides, primarily from its star ingredient: pumpkin. Pumpkin is an excellent source of Vitamin A (in the form of beta-carotene), which is crucial for vision, immune function, and skin health. It also provides a good amount of Vitamin C, potassium, and fiber, contributing to digestive health and satiety. While the sugars and fats in the pie should be consumed in moderation, enjoying a slice in the context of a balanced diet can be a gratifying experience. Making it at home allows you to control sugar content and choose high-quality dairy, offering a distinct advantage over highly processed alternatives.
Tips Variations & Cooking Advice
- Spice it Up: Feel free to adjust the spice levels to your preference. A pinch of black pepper or a dash of allspice can add intriguing depth.
- Crust Variations: For a less traditional but delicious twist, consider a gingerbread crust, a graham cracker crust, or a gluten-free almond flour crust.
- Dairy-Free Option: Substitute the heavy cream with full-fat coconut milk (canned, chilled overnight, scoop out the thick cream) and use plant-based butter for the crust.
- Mini Pies: Use muffin tins to create individual Pumpkin Pie bites, perfect for portion control or a dessert spread.
- Don’t Overbake: An overbaked pumpkin pie will crack and have a dry, crumbly texture. The slight jiggle in the center is exactly what you want.
Common Mistakes to Avoid
- Overworking the Dough: This leads to a tough, bready crust. Handle the dough as little as possible.
- Not Chilling the Dough: Insufficient chilling results in a crumbly, hard-to-roll dough and can lead to a less flaky crust.
- Overbaking the Filling: As mentioned, this causes cracks and a dry texture. Watch for that gentle jiggle.
- Slicing When Warm: Impatience can lead to a messy, unset pie. Let it cool completely!
- Using Pumpkin Pie Filling: Ensure you purchase 100% pure pumpkin purée, not the pre-spiced pie filling, for best control over flavor.
Storage & Meal Prep Tips
Leftover Pumpkin Pie should be covered tightly with plastic wrap or aluminum foil and refrigerated. It will stay fresh for 3-4 days. For longer storage, you can freeze individual slices or the whole pie (if unsliced) for up to one month. Wrap tightly in plastic wrap, then in foil. Thaw in the refrigerator overnight before serving. Reheating is generally not recommended as it can alter the texture of the filling, but if desired, warm slices briefly in a low oven (250°F / 120°C) until just warm through.
Conclusion
Creating a homemade Pumpkin Pie is a rewarding culinary journey that results in a dessert far superior to any store-bought alternative. With its smooth, spiced custard and flaky crust, it’s the quintessential centerpiece for any autumn gathering or a delightful addition to your spread of Thanksgiving Desserts. We hope this guide empowers you to bake with confidence and share the joy of this beloved classic. Give this recipe a try and let us know your results in the comments below! Happy baking!
FAQs
Q1: Can I make the pie crust ahead of time?
A1: Yes, absolutely! You can prepare the pie crust dough up to 2 days in advance and store it in the refrigerator, or freeze it for up to 3 months. Thaw in the refrigerator before rolling.
Q2: My pie cracked on top. What went wrong?
A2: Cracking is usually a sign of overbaking or uneven cooling. Ensure you don’t bake it past the point of a slight jiggle, and let it cool gradually on a wire rack, away from drafts.
Q3: Can I use fresh pumpkin instead of canned purée?
A3: Yes! Peel, seed, and roast or steam fresh pumpkin until tender, then purée it. Ensure it’s very smooth and drained of excess water to avoid a watery filling.
Q4: How do I prevent a soggy pie crust bottom?
A4: Blind baking the crust (as discussed in step 2) is the best way to prevent a soggy bottom. Also, ensure your oven is preheated to the correct temperature.
Q5: What’s the best way to serve Pumpkin Pie?
A5: Classic accompaniments include a dollop of freshly whipped cream, a scoop of vanilla ice cream, or a drizzle of caramel sauce.