Celebrate History with Homemade Juneteenth Red Velvet Cake
Are you ready to create a dessert that’s not just a treat for the taste buds but also a symbol of freedom and resilience? Preparing a homemade Juneteenth Red Velvet Cake at home offers a unique opportunity to connect with history and tradition. This isn’t just about baking; it’s about honoring heritage, sharing love, and creating lasting memories with every vibrant, delicious slice. This iconic cake, with its rich history and captivating color, is the perfect centerpiece for any Juneteenth celebration, representing joy, community, and the enduring spirit of African American culture. Learning to master this recipe will provide you with a treasured skill and a delightful way to explore Juneteenth celebration desserts.
Ingredients & Kitchen Tools
To embark on this culinary journey, gather the following:
Ingredients:
- All-Purpose Flour (2 ½ cups): The structural base for our tender cake.
- Granulated Sugar (1 ½ cups): For perfect sweetness and moisture.
- Unsweetened Cocoa Powder (2 tbsp): Gives the cake its signature subtle chocolate flavor and enhances the red hue.
- Baking Soda (1 tsp): Our leavening agent for a light, airy crumb.
- Salt (1 tsp): Balances flavors and brings out the sweetness.
- Buttermilk (1 cup): Adds tanginess, moisture, and reacts with baking soda for lift. (Substitution: 1 cup milk + 1 tbsp lemon juice or white vinegar, let sit 5 minutes).
- Vegetable Oil (1 cup): Keeps the cake incredibly moist.
- Large Eggs (2): Binds ingredients and adds richness.
- Red Food Coloring (2-3 oz bottle): Essential for the iconic deep red color. (Use gel for a more vibrant hue).
- White Vinegar (1 tsp): Enhances the red color and reacts with baking soda.
- Vanilla Extract (1 tsp): Classic flavor enhancer.
Cream Cheese Frosting:
- Cream Cheese (8 oz block, softened): The star of our tangy, rich frosting.
- Unsalted Butter (½ cup, softened): Adds richness and creaminess.
- Powdered Sugar (3-4 cups): For sweetness and smooth texture.
- Vanilla Extract (1 tsp): For classic flavor.
- Pinch of Salt: Balances the sweetness.
Kitchen Tools:
- Two 9-inch Round Cake Pans: For baking perfectly even layers.
- Mixing Bowls (large and medium): For dry and wet ingredients.
- Electric Mixer (stand or hand-held): Essential for creaming butter and sugar, and mixing batter/frosting.
- Whisk: For combining dry ingredients.
- Rubber Spatula: For scraping bowls and folding ingredients.
- Measuring Cups and Spoons: For accurate ingredient measurement.
- Parchment Paper: To line cake pans for easy release.
- Wire Rack: For cooling cakes evenly.
- Offset Spatula or Butter Knife: For spreading frosting smoothly.
Prep Time & Cooking Schedule
- Prep Time: 30 minutes
- Cook Time: 25-30 minutes per cake layer
- Cooling Time: 1-2 hours (crucial for frosting)
- Assembly & Decorating Time: 30-45 minutes
Plan to start your cake preparation at least 4-5 hours before you intend to serve, allowing ample time for baking and the essential cooling period. For best results, bake the cake layers the day before and frost them on the day of your celebration. This allows the flavors to meld beautifully and the cake to firm up.
Step-by-Step Instructions
1. Prepare Your Pans: Preheat your oven to 350°F (175°C). Grease and flour two 9-inch round cake pans, then line the bottoms with parchment paper. This prevents sticking and ensures clean release.
2. Combine Dry Ingredients: In a large bowl, whisk together the all-purpose flour, granulated sugar, cocoa powder, baking soda, and salt. Ensure there are no lumps for a smooth batter.
3. Mix Wet Ingredients: In a separate medium bowl, whisk together the buttermilk, vegetable oil, eggs, red food coloring, white vinegar, and vanilla extract until well combined and vibrant. The vinegar and food coloring are key to achieving the characteristic hue of this Juneteenth Red Velvet Cake.
4. Combine Wet and Dry: Gradually add the wet ingredients to the dry ingredients, mixing on low speed with an electric mixer until just combined. Do not overmix; overmixing can lead to a tough cake. Scrape down the sides of the bowl to ensure everything is incorporated.
5. Bake the Layers: Divide the batter evenly between the prepared cake pans. Bake for 25-30 minutes, or until a wooden skewer inserted into the center comes out clean. The cake should spring back lightly when touched.
6. Cooling: Remove cakes from the oven and let them cool in the pans for about 10-15 minutes before inverting them onto a wire rack to cool completely. This cooling step is vital for preventing the cake from crumbling when frosted, especially for Juneteenth celebration desserts.
7. Prepare Frosting: While cakes cool, beat the softened cream cheese and butter together in a large bowl with an electric mixer until light and fluffy. Gradually add the powdered sugar, one cup at a time, mixing until smooth. Beat in the vanilla extract and a pinch of salt. If too thick, add a tablespoon of milk; if too thin, add more powdered sugar.
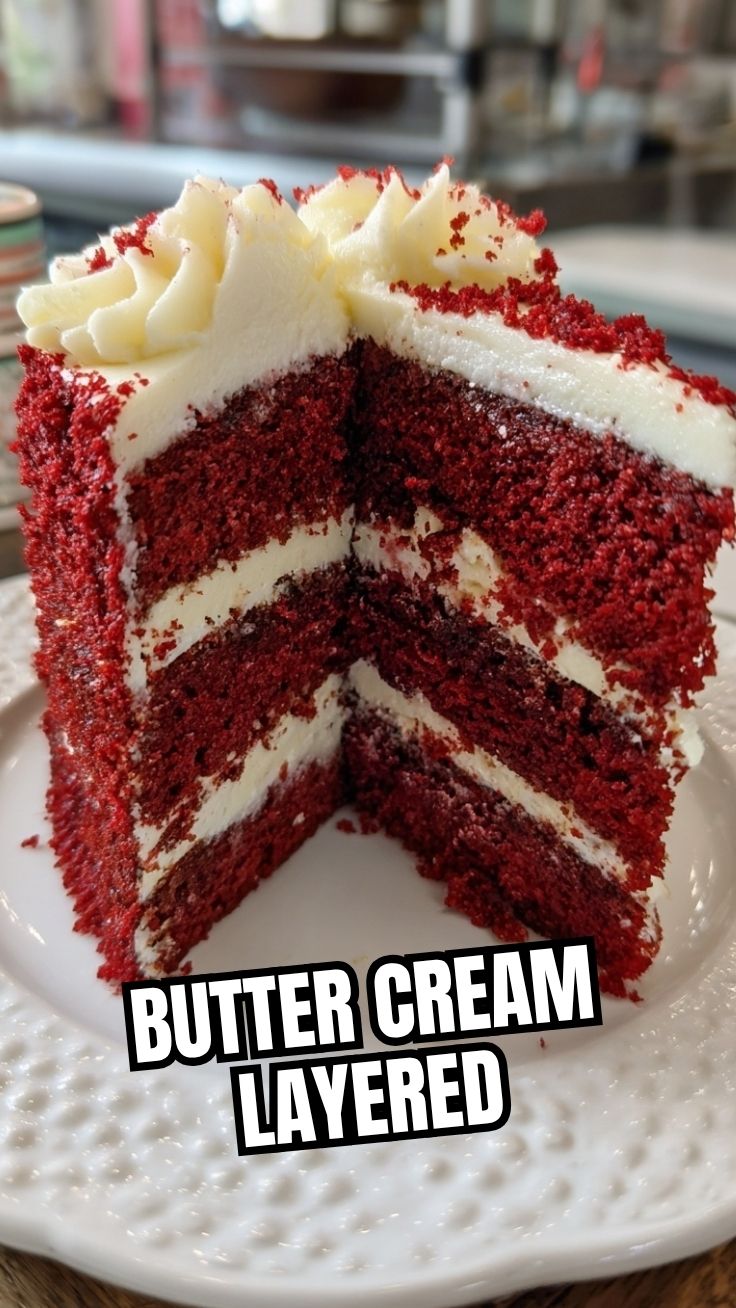
8. Assemble and Frost: Once the cake layers are completely cool, level them with a serrated knife if necessary. Place one layer on your serving plate, spread a generous amount of cream cheese frosting, then top with the second layer. Frost the top and sides of the entire cake. Decorate as desired, perhaps with red velvet crumbs or fresh berries.
Nutritional Benefits & Advantages
Red Velvet Cake, while a decadent treat, offers some surprising benefits thanks to a few key ingredients. The buttermilk contributes beneficial probiotics and calcium. The small amount of cocoa powder introduces antioxidants, similar to those found in darker chocolates. Additionally, making this cake from scratch allows you to control the quality of ingredients, opting for organic or locally sourced butter, eggs, and flour, which can enhance both flavor and nutritional profile. It’s a dessert best enjoyed in moderation, offering joy and satisfaction without excessive guilt.
Tips Variations & Cooking Advice
- Vibrant Color: For an even deeper red, opt for gel food coloring over liquid.
- Flavor Boost: Add a teaspoon of almond extract to the frosting for a slight nutty note that complements the vanilla and cream cheese.
- Gluten-Free: Substitute the all-purpose flour with a 1:1 gluten-free baking blend.
- Dairy-Free: Use a dairy-free buttermilk substitute (plant-based milk + vinegar) and dairy-free cream cheese and butter alternatives for the frosting.
- Cupcakes: Bake as cupcakes for individual portions, reducing baking time to 18-22 minutes.
- Layering Hack: For perfectly even layers, weigh your batter and divide it equally between the pans.
- Room Temperature Ingredients: Ensure your butter, cream cheese, and eggs are at room temperature for the best emulsion and smoothest batter/frosting.
Common Mistakes to Avoid
Overmixing the Batter: This develops the gluten, resulting in a tough, dense cake. Mix just* until combined.
- Not Cooling Cakes Completely: Frosting a warm cake will lead to melted, sliding frosting – a messy disaster! Patience is key.
- Using Cold Cream Cheese/Butter for Frosting: This leads to lumpy frosting that’s hard to spread smoothly.
- Inaccurate Measuring of Flour: Too much flour can make the cake dry. Use the spoon and level method (spoon flour into measuring cup, then level off with a straight edge).
- Ignoring the Vinegar: The vinegar is crucial for activating the baking soda and enhancing the red color; don’t skip it!
Storage & Meal Prep Tips
Your homemade Red Velvet Cake with cream cheese frosting should be stored in an airtight container in the refrigerator. It will stay fresh for up to 3-4 days. For longer storage, individual slices or unfrosted cake layers can be wrapped tightly in plastic wrap and then foil, and frozen for up to 2-3 months. Thaw frozen cake in the refrigerator overnight before serving or frosting. To maintain texture and flavor, avoid leaving frosted cake at room temperature for extended periods, especially in warm climates.
Conclusion
Baking a homemade Juneteenth Red Velvet Cake is more than just following a recipe; it’s an act of cultural appreciation and a delightful way to commemorate a significant historical event. This cake, with its striking color and complex flavors, perfectly embodies the spirit of resilience and joy that defines Juneteenth. We encourage you to try this recipe and share your results, making it a delicious addition to your spread of Juneteenth celebration desserts.
FAQs
Q1: Can I make this cake without red food coloring?
A1: Technically, yes, but it won’t be a classic red velvet. It will be a very light cocoa-flavored cake. The red coloring is essential for its iconic appearance.
Q2: My cake layers sunk in the middle. What went wrong?
A2: This often happens due to oven door opening too early, overmixing the batter, or an inaccurate oven temperature. Ensure your oven is properly calibrated.
Q3: How can I make my cream cheese frosting less sweet?
A3: Reduce the amount of powdered sugar gradually, tasting as you go. You can also add an extra pinch of salt to balance the sweetness.
Q4: Can I use cake flour instead of all-purpose flour?
A4: Yes, cake flour will result in an even softer, more tender crumb. If using cake flour, you might need to use slightly more to maintain consistency, as it has less protein.
Q5: How far in advance can I bake the cake layers?
A5: You can bake the cake layers up to 2 days in advance. Once completely cooled, wrap them tightly in plastic wrap and store them at room temperature until ready to frost.