Unlock the Secret to the Crispiest, Juiciest Fried Chicken at Home
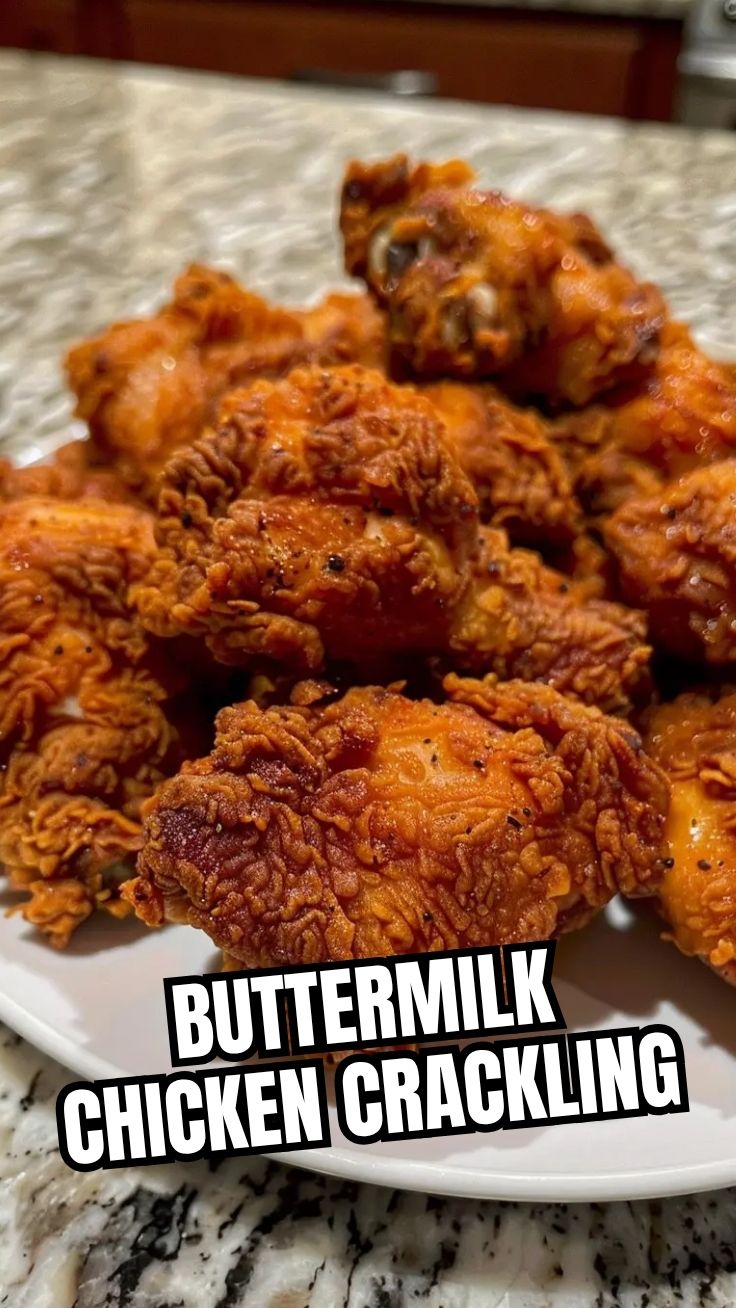
Ever wondered how restaurants achieve that unbelievably crispy crust and succulent interior in their fried chicken? The secret isn’t just a closely guarded family recipe; it’s a combination of technique, patience, and a star ingredient. Today, we’re diving deep into mastering a truly exceptional fried chicken at home. Forget dry, bland chicken – we’re talking about a golden, crunchy sensation that will have everyone begging for more. Preparing this culinary masterpiece yourself isn’t just about saving money; it’s about control over ingredients, personalized flavor, and the sheer satisfaction of creating something extraordinary. Our focus today is on crafting perfect Buttermilk Fried Chicken, a staple that elevates any meal. This guide will walk you through every step, ensuring you achieve that legendary crispness and tender interior, rivaling even the finest restaurant versions of Southern fried chicken.
Ingredients & Kitchen Tools
To embark on this flavorful journey, gather these essentials:
Main Ingredients:
- Whole Chicken (cut into 8 pieces): Thighs, drumsticks, breasts, and wings – provides variety and ensures even cooking. Opt for organic for best flavor.
- Buttermilk (4 cups): Our secret weapon for tenderizing and adding a tangy depth. Don’t substitute with regular milk if possible.
- All-Purpose Flour (3 cups): The base for our crispy coating.
- Cornstarch (1 cup): Adds extra crispness and helps achieve that golden-brown finish.
- Paprika (2 tbsp): For a touch of warmth and color.
- Garlic Powder (1 tbsp): Essential aromatic foundation.
- Onion Powder (1 tbsp): Enhances savory notes.
- Cayenne Pepper (1-2 tsp, optional): For a subtle kick of heat. Adjust to your preference.
- Black Pepper (1 tbsp): Freshly ground is always best.
- Salt (2 tbsp): Crucial for seasoning the chicken and the coating.
- Vegetable Oil or Peanut Oil (6-8 cups): For deep frying. Choose an oil with a high smoke point.
Kitchen Tools:
- Large Mixing Bowls (2): One for the buttermilk marinade, one for the flour dredge.
- Whisk: To thoroughly combine dry ingredients.
- Tongs: For safely handling chicken in and out of hot oil.
- Dutch Oven or Deep Fryer: Essential for maintaining consistent oil temperature and safely frying.
- Wire Rack with Baking Sheet: For draining excess oil and keeping chicken crispy.
- Instant-Read Thermometer: Crucial for ensuring the chicken is cooked through and oil temperature is accurate.
- Paper Towels: For blotting excess oil.
Prep Time & Cooking Schedule
- Prep Time: 20 minutes (for seasoning and dredging)
- Marinating Time: Minimum 4 hours, ideally 12-24 hours (for maximum tenderness and flavor infusion)
- Cook Time: 20-25 minutes per batch (depending on chicken piece size)
- Resting Time: 10 minutes (after frying, to redistribute juices)
This schedule emphasizes the importance of marination for tender, flavorful chicken. Plan ahead to allow sufficient time for the buttermilk to work its magic, transforming ordinary chicken into an extraordinary culinary experience.
Step-by-Step Instructions
1. Prepare the Chicken: Pat your chicken pieces very dry with paper towels. This helps the marinade adhere better and promotes a crispier skin.
2. Marinate in Buttermilk: In a large bowl, combine the chicken pieces with the buttermilk. Ensure all chicken is fully submerged. Cover and refrigerate for at least 4 hours, or preferably overnight to achieve ultimate tenderness for our Buttermilk Fried Chicken. This acidic marinade breaks down tough muscle fibers.
3. Create the Dredge: In another large bowl, whisk together the flour, cornstarch, paprika, garlic powder, onion powder, cayenne pepper (if using), black pepper, and salt. Make sure it’s thoroughly combined.
4. Dredge the Chicken: Remove chicken from the buttermilk, allowing excess to drip off (do not rinse). Dredge each piece generously in the seasoned flour mixture, pressing firmly to ensure an even and thick coating. Shake off any excess. Place dredged chicken on a wire rack to allow the coating to set for about 15-20 minutes. This helps the breading adhere better during frying.
5. Heat the Oil: Pour vegetable or peanut oil into a Dutch oven or deep fryer, ensuring it’s at least 3-4 inches deep. Heat the oil to 350°F (175°C). Use an instant-read thermometer to monitor the temperature accurately.
6. Fry the Chicken: Carefully lower 2-3 pieces of chicken into the hot oil, ensuring not to overcrowd the pot. Overcrowding will lower the oil temperature and result in greasy, less crispy chicken. Maintain the oil temperature between 325-350°F (160-175°C).
7. Cook Until Golden: Fry chicken pieces for 6-8 minutes per side, or until golden brown and cooked through. Breasts typically take 8-10 minutes, while thighs and drumsticks might take 10-12 minutes. The internal temperature should reach 165°F (74°C) at its thickest part. For that authentic Southern fried chicken texture, ensure the crust is a deep, appealing golden.
8. Drain and Rest: Carefully remove fried chicken from the oil and place it on a wire rack set over a baking sheet to drain excess oil. Do not place on paper towels immediately, as this can make the bottom soggy. Season lightly with additional salt immediately after frying.
9. Repeat: Continue frying in batches until all chicken is cooked. Allow the oil to return to temperature between batches. Serve hot and enjoy!
Nutritional Benefits & Advantages
Our Buttermilk Fried Chicken, while a comfort food, offers some nutritional advantages. Chicken provides a significant source of lean protein, essential for muscle repair and growth. Buttermilk, a fermented dairy product, also introduces beneficial probiotics that can aid digestion. When prepared at home, you control the quality of ingredients and the type of oil used, a stark improvement over many fast-food options. While frying does add calories, moderate consumption of this protein-rich meal, paired with healthy sides, can be part of a balanced diet.
Tips, Variations & Cooking Advice
- Spice it Up: Add a pinch of smoked paprika, chili powder, or a dash of your favorite hot sauce to the buttermilk marinade for an extra layer of flavor.
- Gluten-Free Option: Substitute all-purpose flour with a 1:1 gluten-free flour blend for a delicious gluten-free version.
- Herb Infusion: Fresh herbs like thyme or rosemary can be added to the marinade or the flour dredge for an aromatic twist.
- Double Dredging: For an extra thick and crunchy crust, after the initial dredge, dip the chicken back into a little buttermilk, then dredge again in the flour mixture.
- Oven Finish: If you’re concerned about undercooked chicken, you can finish the fried pieces in a 350°F (175°C) oven for 10-15 minutes after frying, especially for larger cuts.
Common Mistakes to Avoid
- Overcrowding the Pot: This is the cardinal sin of frying! It drastically drops the oil temperature, leading to greasy, soggy chicken. Fry in small batches.
- Not Patting Chicken Dry: Moisture on the chicken prevents the dredge from adhering and leads to less crispy results.
- Insufficient Marination Time: Shorter marination means less tender and less flavorful chicken. Don’t rush this step.
- Incorrect Oil Temperature: Too low, and the chicken absorbs too much oil. Too high, and the exterior burns before the interior cooks. Use a thermometer!
- Skipping the Resting Time: Allowing the dredged chicken to rest helps the coating “set,” preventing it from falling off during frying.
Storage & Meal Prep Tips
Leftover fried chicken can be stored in an airtight container in the refrigerator for up to 3-4 days. For longer storage, freeze individual pieces on a baking sheet until solid, then transfer to a freezer-safe bag for up to 2-3 months. To reheat, the best method for maintaining crispness is to place it on a wire rack in a preheated oven at 375°F (190°C) for 15-20 minutes, or until thoroughly heated through. Avoid microwaving, as it will make the crust soggy.
Conclusion
Mastering homemade fried chicken might seem daunting, but with this detailed guide, you’re well on your way to creating a culinary masterpiece that will impress everyone. The secret truly lies in the buttermilk marinade, precise oil temperatures, and proper dredging techniques. By following these steps, you’ll consistently achieve that perfect balance of tender, juicy meat and an incredibly crispy, flavorful crust. Whether you’re craving classic Buttermilk Fried Chicken or an authentic taste of Southern fried chicken, this recipe is your definitive guide. Give it a try, experiment with your favorite spices, and share your delicious results! What’s your favorite side to pair with fried chicken? Let us know in the comments below!
FAQs
Q1: Can I use chicken breast for this recipe?
A1: Absolutely! Chicken breasts work well, but they tend to cook faster, so keep an eye on the internal temperature to prevent them from drying out. They may also benefit from being pounded slightly thinner to ensure even cooking.
Q2: What if I don’t have buttermilk?
A2: You can make a homemade buttermilk substitute by adding 1 tablespoon of lemon juice or white vinegar to 1 cup of regular milk and letting it sit for 5-10 minutes until it slightly curdles. However, for the best tenderizing and flavor, store-bought buttermilk is recommended.
Q3: How do I know when the oil is at the right temperature without a thermometer?
A3: While a thermometer is highly recommended, a quick test involves dropping a pinch of flour into the hot oil. If it immediately sizzles and floats, the oil is ready. If it burns instantly, the oil is too hot; if it barely reacts, it’s too cool.
Q4: Can I bake this fried chicken instead of frying?
A4: While you won’t achieve the exact same deep-fried crispness, you can oven-bake buttermilk chicken. After dredging, place the chicken on a greased wire rack over a baking sheet and bake at 400°F (200°C) for 35-45 minutes, flipping halfway, until cooked through and golden.
Q5: What are some good side dishes to serve with fried chicken?
A5: Classic pairings include creamy mashed potatoes, coleslaw, corn on the cob, fluffy biscuits, or a fresh green salad. These sides complement the rich flavor and texture of the fried chicken beautifully.